Something I recently ran into with Zerto (and this can happen for anything else) was the dilemma of being able to protect remote sites that (doesn’t happen often) happen to have IP addresses that are identical in both the protected and recovery sites. And no, this wasn’t planned for, it was just discovered during my Zerto deployment in what we’ll call the protected sites.
Luckily, our network team had provisioned two new networks that are isolated, and connected to these protected sites via MPLS. Those two new networks do not have the ability to talk back to our existing enterprise network without firewalls getting involved, and this is by design since we are basically consolidating data centers while absorbing assets and virtual workloads from a recently acquired company.
When I originally installed the ZVM in my site (which we’ll call the recovery site), I had used IP addresses for the ZVM and VRAs that were part of our production network, and not the isolated network set aside for this consolidation. Note: I installed the Zerto infrastructure in the recovery site ahead of time before discussions about the isolated networks was brought up. So, because I needed to get this onto the isolated network in order to be able to replicate data from the protected sites to the recovery site, I set out to re-IP the ZVM, and re-IP the VRAs. Before I could do that, I needed to provide justification for firewall exceptions in order for the ZVM in the recovery site to link to the vCenter, communicate with ESXi hosts for VRA deployment, and also to be able to authenticate the computer, users, service accounts in use on the ZVM. Oh, and I also needed DNS and time services.
The network and security teams asked if they could NAT the traffic, and my answer was “no” because Zerto doesn’t support replication using NAT. That was easy, and now the network team had to create firewall exceptions for the ports I needed.
Well, as expected, they delivered what I needed. To make a long story short, it all worked, and then about 12 hours before we were scheduled to perform our first VPG move, it all stopped working, and no one knew why. At this point, it was getting really close to us pulling the plug on the migration the following day, but I was determined to get this going and prevent another delay in the project.
When looking for answers, I contacted my Zerto SE, reached out on twitter, and also contacted Zerto Support. Well, at the time I was on the phone with support, we couldn’t do anything because communication to the resources I needed was not working. We couldn’t perform a Zerto re-configure to re-connect to the vCenter, and at this point, I had about 24VPGs that were reporting they were in sync (lucky!), but ZVM to ZVM communication wasn’t working, and recovery site ZVM was not able to communicate with vCenter, so I wouldn’t have been able to perform the cutover. So since support couldn’t help me out in that instance, I scoured the Zerto KB looking for an alternate way of configuring this where I could get the best of both worlds, and still be able to stay isolated as needed.
I eventually found this KB article that explained that not only is it supported, but it’s also considered a best practice in CSP or large environments to dual-NIC the ZVM to separate management from replication traffic. I figured, I’m all out of ideas, and the back-and-forth with firewall admins wasn’t getting us anywhere; I might as well give this a go. While the KB article offers the solution, it doesn’t tell you exactly how to do it, outside of adding a second vNIC to the ZVM. There were some steps missing, which I figured out within a few minutes of completing the configuration. Oh, and part of this required me to re-IP the original NIC back to the original IP I used, which was on our production network. Doing this re-opened the lines of communication to vCenter, ESXi hosts, AD, DNS, SMTP, etc, etc… Now I had to focus on the vNIC that was to be used for all ZVM to ZVM as well as replication traffic. In a few short minutes, I was able to get communication going the way I needed it, so the final thing I needed to do was re-configure Zerto to use the new vNIC for it’s replication-related activities. I did that, and while I was able to re-establish the production network communications I needed, now I wasn’t able to access the remote sites (ZVM to ZVM) or access the recovery site VRAs.
It turns out, what I needed here were some static, persistent routes to the remote networks, configured to use the specific interface I created for it.
Here’s how:
The steps I took are below the image. If the image is too small, consider downloading the PDF here.
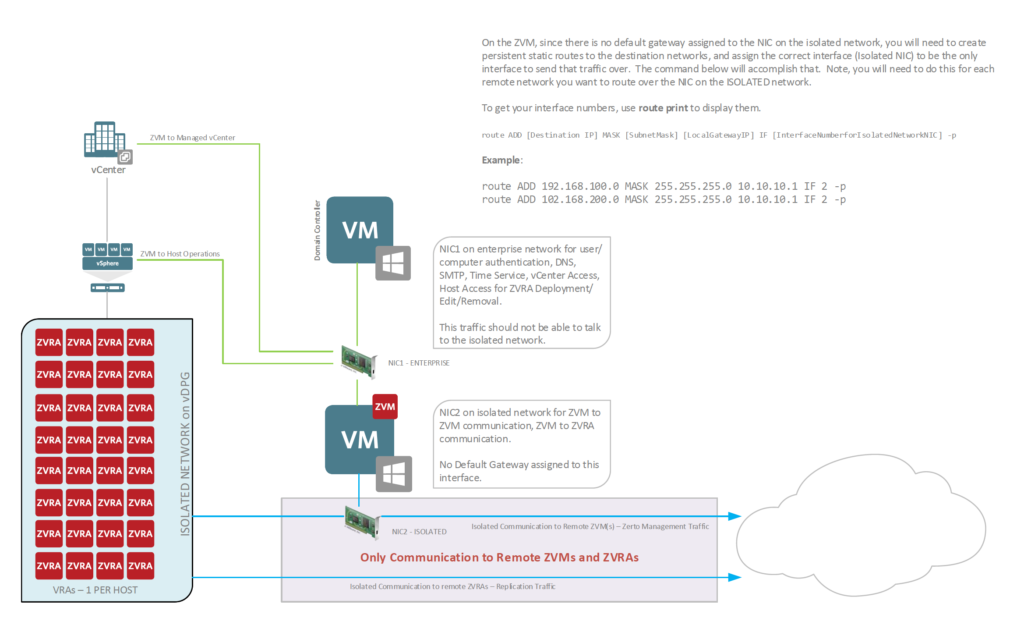
On the ZVM:
- Power it down, add 2nd vNIC and set it’s network to the isolated network. Set the primary vNIC to the production network.
- Power it on. When it’s booted up, log in to Windows, and re-configure the IP address for the primary vNIC. Reboot to make sure everything comes up successfully now that it is on the correct production network.
- After the reboot, edit the IP configuration of the second vNIC (the one on the isolated network). DO NOT configure a default gateway for it.
- Open the Zerto Diagnostics Utility on the ZVM. You’ll find this by opening the start menu and looking for the Zerto Diagnostics Utility. If you’re on Windows Server 2008 or 2012, you can search for it by clicking the start menu and starting to type “Zerto.”
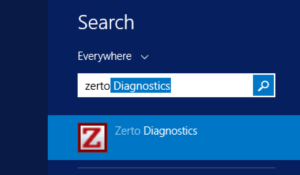
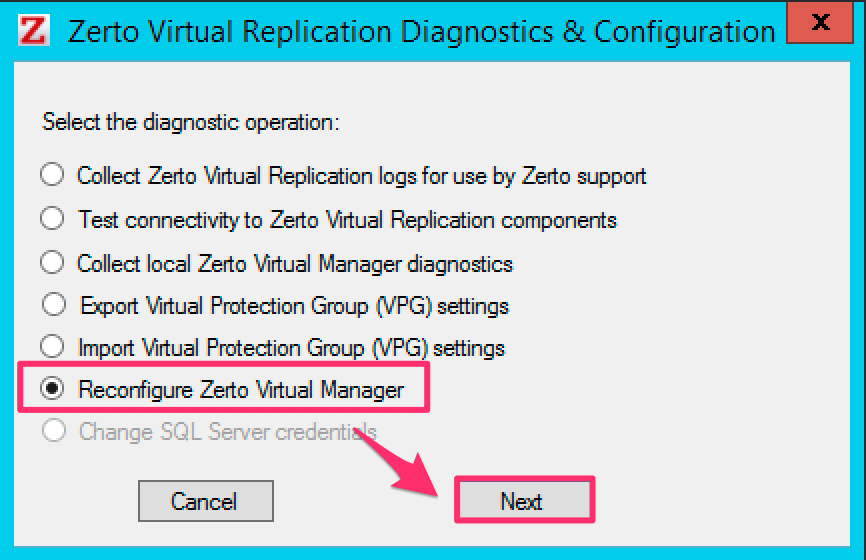
- Once the Zerto Diagnostics Utility loads, select “Reconfigure Zerto Virtual Manager” and click Next.
- On the vCenter Server Connectivity screen, make any necessary changes you need to and click Next. (Note: We’re only after changing the IP address the ZVM uses for replication and ZVM-to-ZVM communication, so in most cases, you can just click Next on this screen.)
- On the vCloud Director (vCD) Connectivity screen, make any necessary changes you need to and click Next. (Note: same note in step 6)
- On the Zerto Virtual Manager Site Details screen, make any necessary changes you need to and click Next. (Note: same as note in step 6)
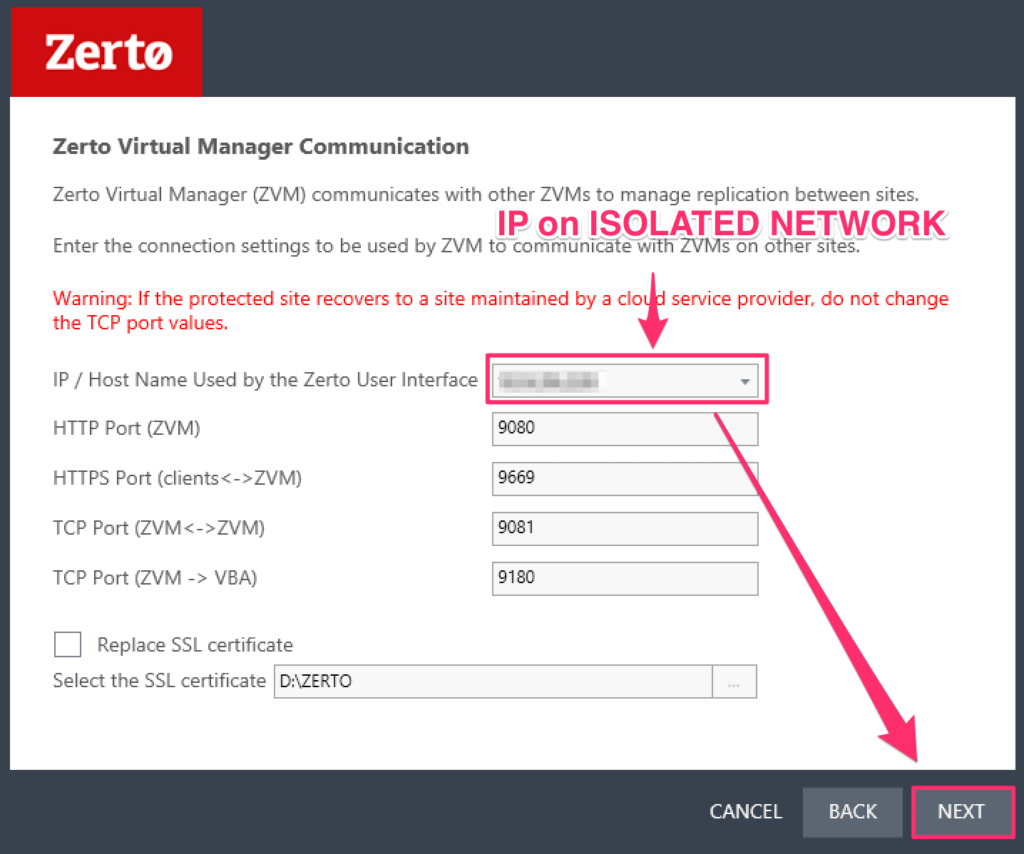
- On the Zerto Virtual Manager Communication screen, the only thing to change here is the “IP/Host Name Used by the Zerto User Interface.” Change this to the IP Address of your vNIC on the isolated Network, then click Next.
- Continue to accept any defaults on following screens, and after validation completes, click Finish, and your changes will be saved.
- Once the above step has completed, you will now need to add a persistent, static route to the Windows routing table. This will tell the ZVM that for any traffic destined for the protected site(s), it will need to send that traffic over the vNIC that is configured for the isolated network.
- Use the following route statement from the Windows CLI to create those static routes:
route ADD [Destination IP] MASK [SubnetMask] [LocalGatewayIP] IF [InterfaceNumberforIsolatedNetworkNIC] -p
Example:>
route ADD 192.168.100.0 MASK 255.255.255.0 10.10.10.1 IF 2 -p
route ADD 102.168.200.0 MASK 255.255.255.0 10.10.10.1 IF 2 -p
Note: To find out what the interface number is for your isolated network vNIC, run route print from the Windows CLI. It will be listed at the top of what is returned.

Once you’ve configured your route(s), you can test by sending pings to remote site IP addresses that you would normally not be able to see.
After performing all of these steps, my ZVMs are now communicating without issue and replications are all taking place. A huge difference from hours before when everything looked like it was broken. The next day, we were able to successfully move our VPGs from protected sites to recovery sites without issue, and reverse protect (which we’re doing for now as a failback option until we can guarantee everything is working as expected).
If this is helpful or you have any questions/suggestions, please comment, and please share! Thanks for reading!
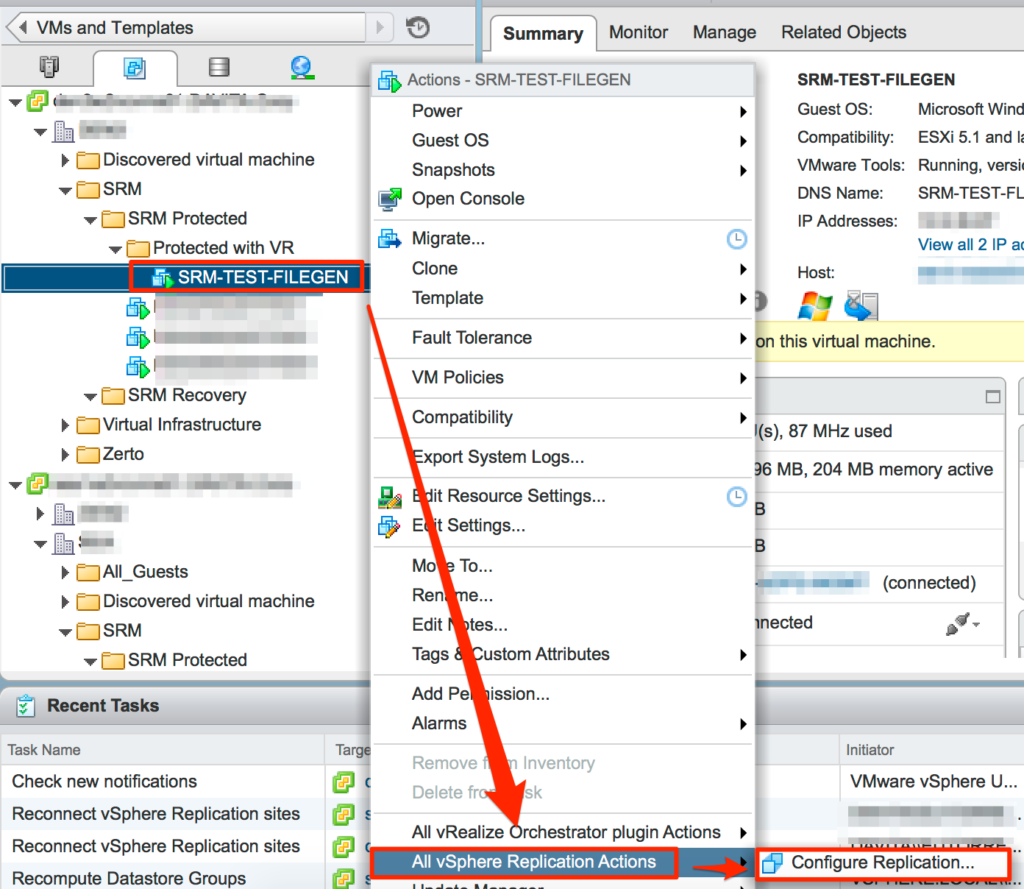
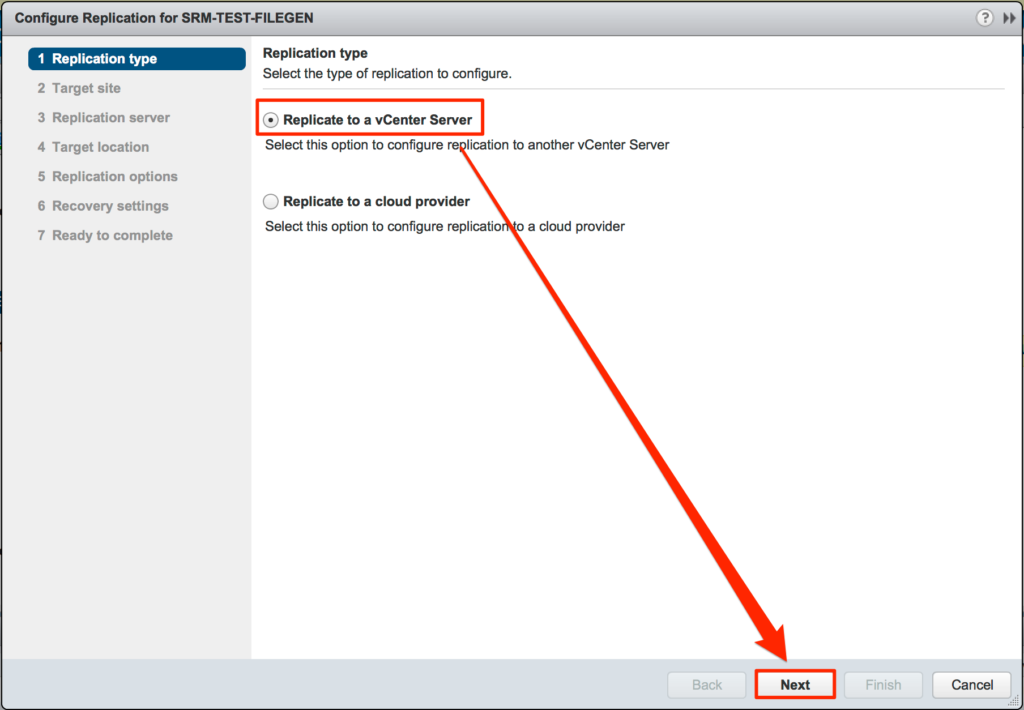
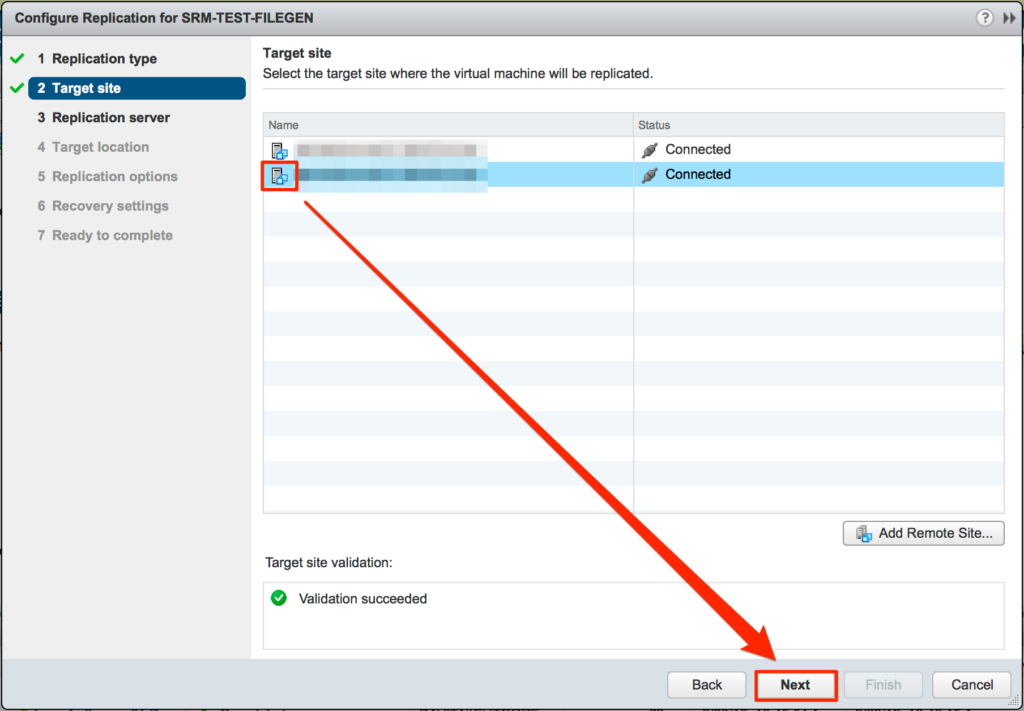
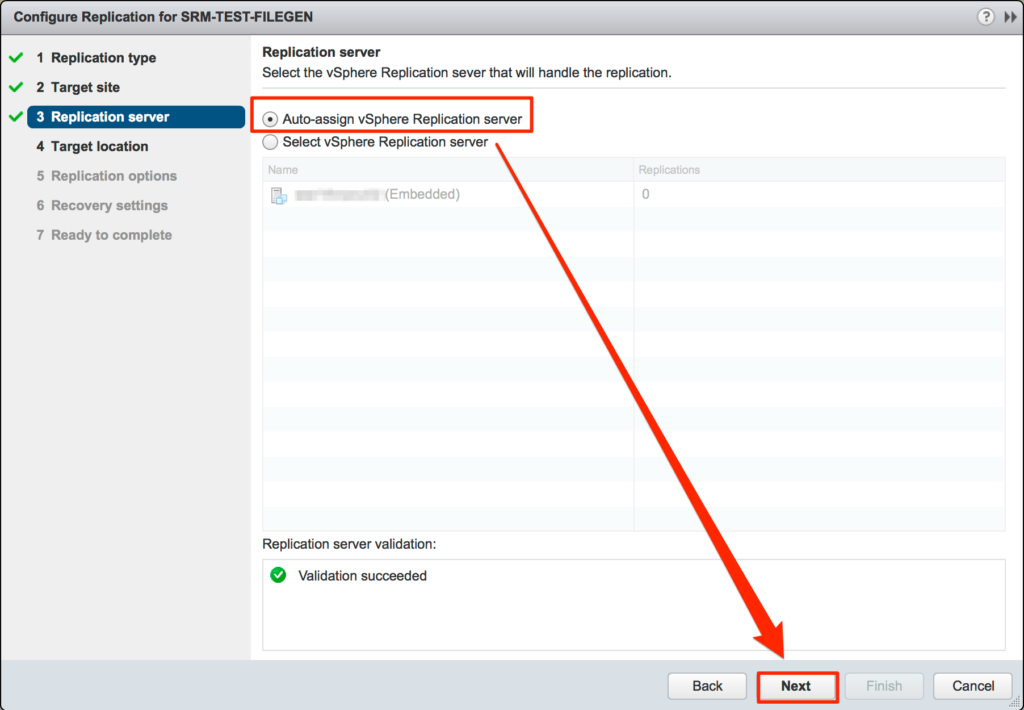
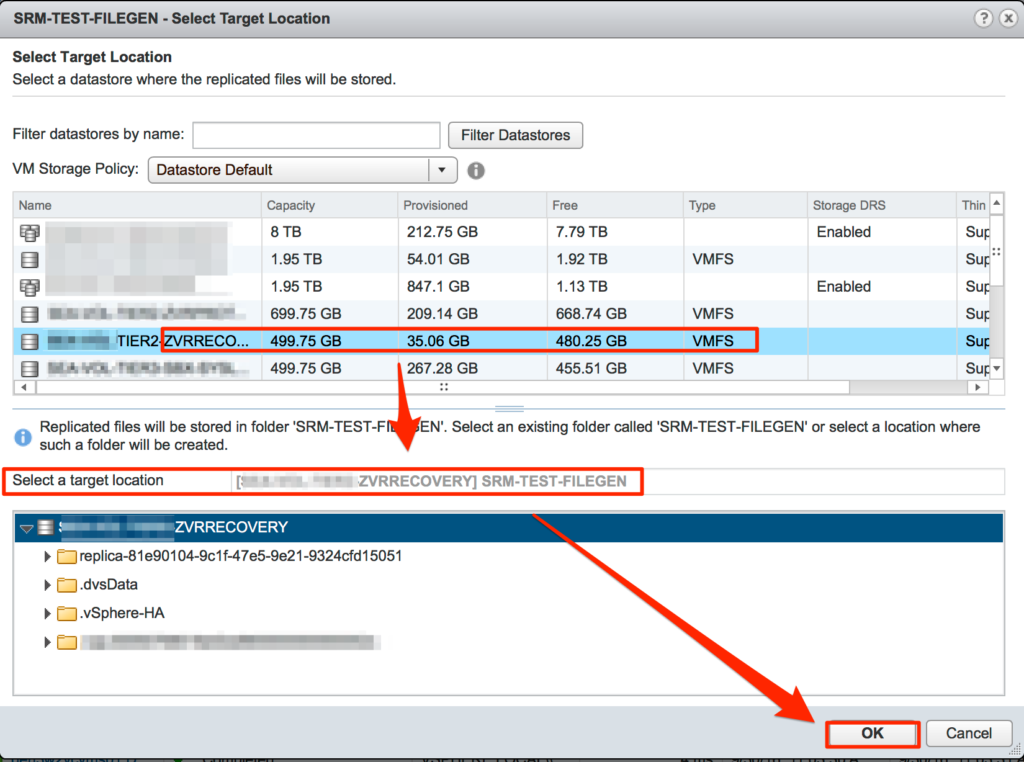
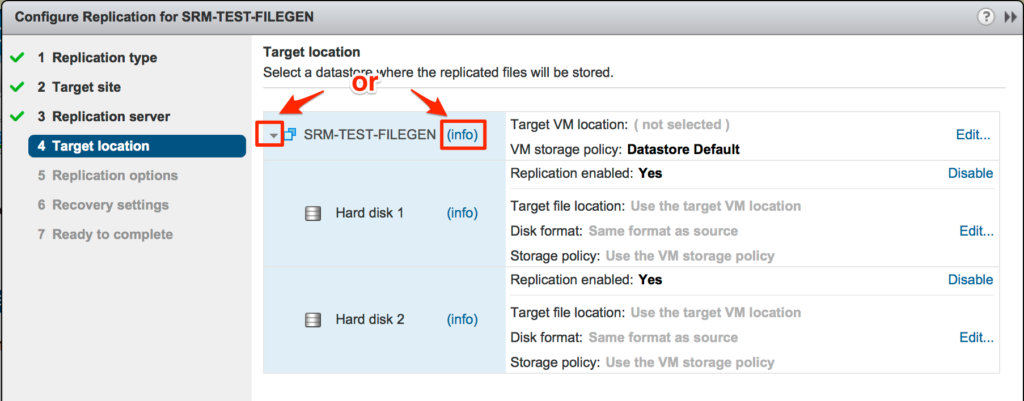 – Click edit in the area labeled Target VM Location, select the target datastore and location for the recovery VM, then click OK to be returned to the previous screen.
 – Typically, the previous step would be enough, however, if you want to place VMDKs in specific datastores, edit their format (thick vs. thin provisioned), or assign a policy, use the edit links beside each hard disk. Once all your settings are how you want them, click Next.
