I had previously written a post in response to a problem a customer was facing with migrating from Microsoft Hyper-V to VM vSphere.
You can find that previous post here: Migrate VM from Hyper-V to vSphere with Pre-Installed VMware Tools
I am writing this as a follow-up, because while the workaround I documented still works (for vSphere 6.x VMware Tools), something with the VMware Tools had changed when vSphere 7 went GA. Several attempts to manipulate the new .msi file proved to not work, and in the flurry of life, I hadn’t had a chance to really sit down and figure it out. So, the workaround for “now” was to install the working 6.x version, get migrated, and then upgrade VMware Tools; and that still works, by the way.
Then one day, I was going through my blog comments someone had responded, saying they’d figured it out. @Chris, thank you very much for sharing your find!
So, since vSphere 8 recently went GA, I figured I’d also test this procedure on VMware Tools 12, and I’m happy to say, it also works. So here’s what’s changed from the previous post when you’re trying to do the same using VMware Tools 11 (vSphere 7) or VMware Tools 12 (vSphere 8).
What You Will Need
Before you can get started, you’ll need to get a few things. For details on how to get these requirements, refer to the original post mentioned above.
- Microsoft Orca (allows you to edit .msi files) – This is part of the Windows SDK, so if you don’t have it, see the post referenced above for the link to download as well as the procedure to only install Orca.
- VMware Tools 11 or 12
- Visual C++ 2017 Redistributable (if you’re following the procedure to get the VMware Tools from your own system, be sure to grab the vcredist_x64.exe)
If you would like to skip editing the VMware Tools MSI, you can download already “jailbroken” versions below.
Note: These worked in the testing I performed, and I will not be making any changes to them, supporting them, or be responsible for what you download off of the Internet. To be absolutely sure you have complete control over what you install in your environment (ESPECIALLY IN PRODUCTION), download from trusted sources and perform the edit to the MSI yourself.
Edit VMware Tools MSI with Orca (for VMware Tools 11 and VMware Tools 12)
- Launch Orca
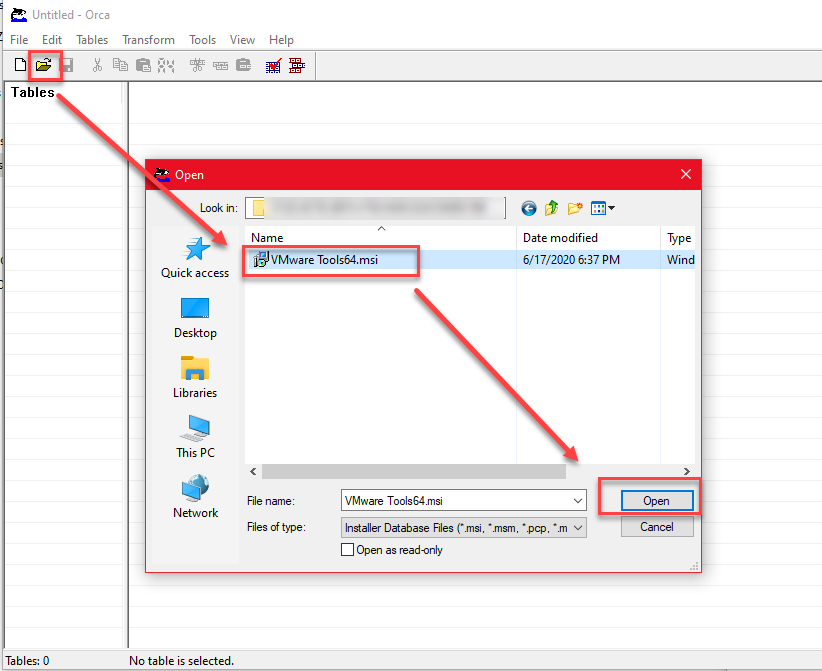
- Click Open, and browse to where you saved VMware Tools64.msi, select it, and click Open.
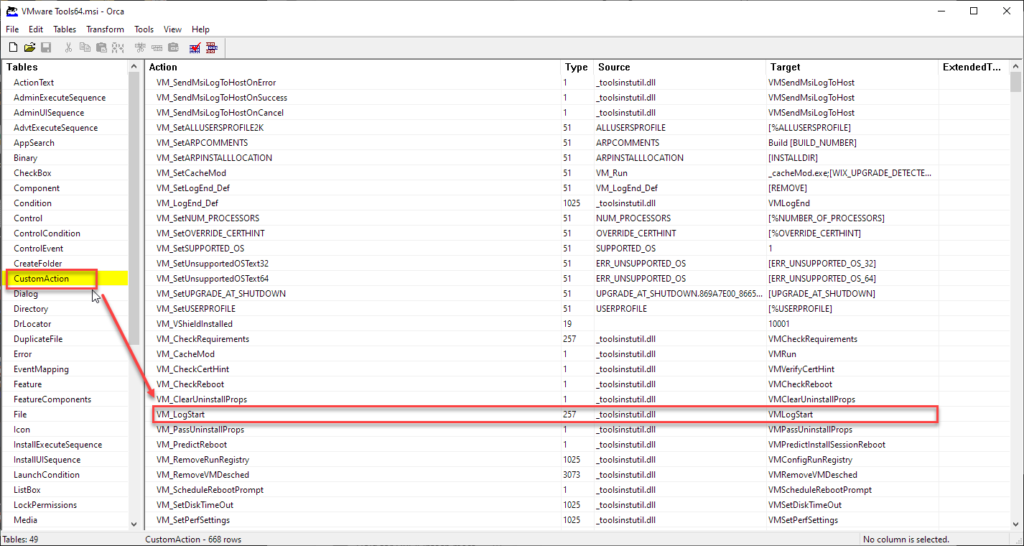
- In the left window pane labeled Tables, scroll down and click on CustomAction.
- In the right window pane, look for the line that says VM_LogStart, right-click it, and select Drop Row.
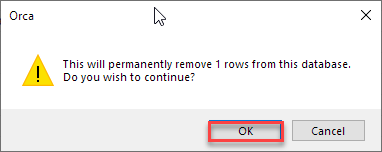
- When prompted, click OK to confirm.
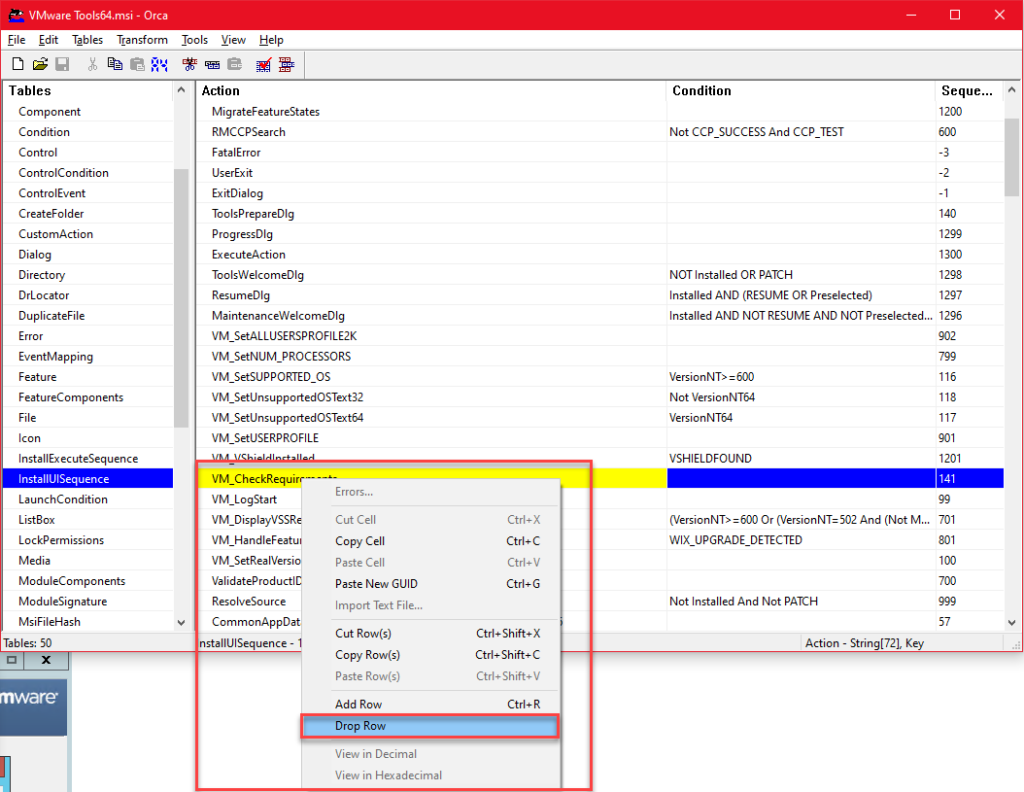
- In the left window pane labeled Tables, scroll down and click on InstallUISequence.
- In the right window pane, look for the line that says VM_CheckRequirements. Right-click on this entry, and select Drop Row.
- When prompted, click OK to confirm.
- Click save on the toolbar, and close the MSI file. You can also exit Orca now.
Next Steps
Now that you’ve successfully edited the MSI file to be able to be installed on your Hyper-V Windows VMs, copy the installers (don’t forget vcredist_x64.exe) and install. When it asks for a reboot, you can safely ignore it, because once the VM boots up in vSphere, it would have already taken care of that for you. (One less disruption to your production Hyper-V virtual machine).
Thanks for reading! GLHF
If you found this useful and know of any others looking to do the same, please share and comment. I’d like to hear if/how it’s helped you out! If you’d like to reach me on social media, you can also follow me and DM me on Twitter @eugenejtorres