Introduction
This how-to will walk through the installation and configuration of array-based replication features for VMware Site Recovery Manager 6.1.
Before configuring array-based replication for use with VMware SRM, there are some pre-requisites. First of all, you’re going to need to visit the VMware Compatibility Guide, which will help you determine if your specific array vendor is supported for use with SRM. Second, there are steps to take to configure array based replication on the storage side, and that portion is out-of-scope for this blog, as I did not have access to do so.
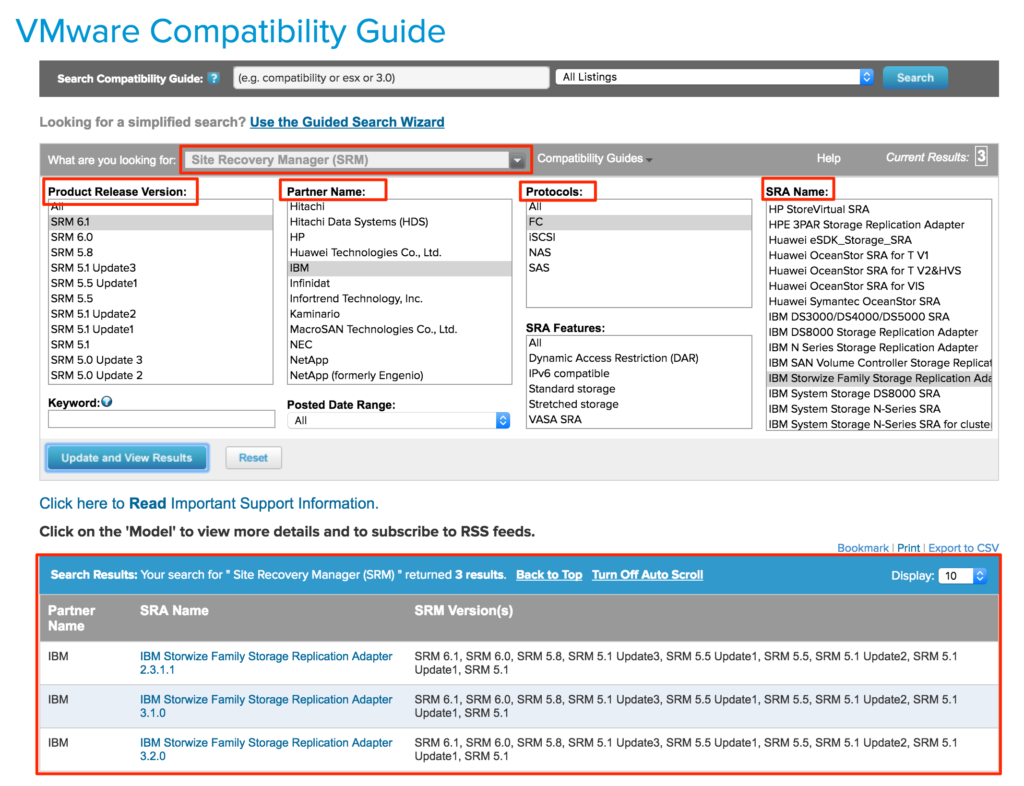
There are several ways to search the compatibility guide, but to be specific, you can select entries from the areas highlighted above. The bottom section that is highlighted will be your results once you click “Update and View Results.” The reason why I wanted to point this step out is because if you assume your array vendor is supported, and don’t verify first, you could end up wasting your time planning and designing.
For this example, we are using SRM 6.1 with the Fibre Channel protocol on IBM SVC-fronted DS8K’s in both sites. I wanted to point that out because when I first set out to find the SRAs for use with our solution, I attempted to use the “IBM DS8000 Storage Replication Adapter”, later to find out it wasn’t the correct one. The correct SRA for use with my environment is the “IBM Storwize Family Storage Replication Adapter”, so there may be a little bit of trial and error with this; however, if you do it up front during testing, you’ll save yourself some time later when deploying to production.
That all said, once you’ve verified your storage is supported, and what version of the SRA to download, you can get it by visiting the VMware downloads (you will need to login). Be sure to also verify that the version of the SRA you are downloading is compatible with the version of array manager code you’re running.
Installing the SRA
Before you Begin – Prior to installing the SRA on the SRM server in each site (protected and recovery), you should have already paired the sites successfully. Also, if you haven’t installed SRM yet, you will need to, otherwise the SRA installer will fail once it discovers that SRM is not installed.
Installing the SRA should be straightforward and painless, as there are not many options to configure during installation. Once the installation is completed on both the protected and recovery SRM servers, proceed.
Verify That SRM Has Registered the SRAs
- Once you’ve installed the SRA on each site’s SRM server, log into the vSphere Web Client, and go to Site Recovery > Sites and select a site.
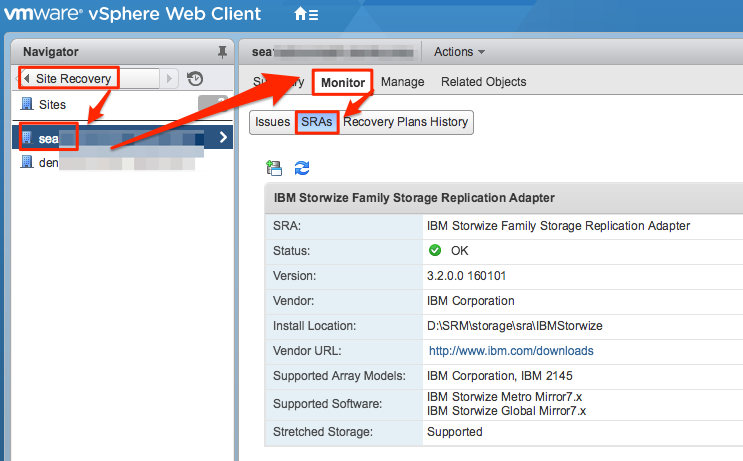
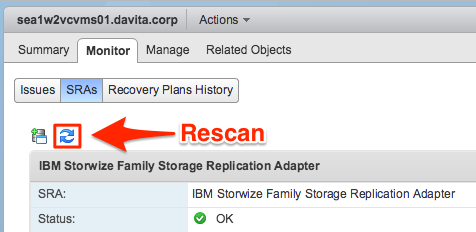
From this view, you can see what SRA has been installed, its status, and compatibility information. - Click the rescan button to ensure the connection is valid and there are no errors.
Configure Array Managers
After pairing the protected and recovery sites, you will need to configure the respective array managers so SRM can discover replicated devices, compute datastore groups, and initiate storage operations. You typically only need to do this once, however, if array access credentials change, or you want to use a different set of arrays, you can edit the connections to update accordingly.
Pre-Requisites
- Sites have been paired and are connected
- SRAs have been installed at both sites and verified
Procedure
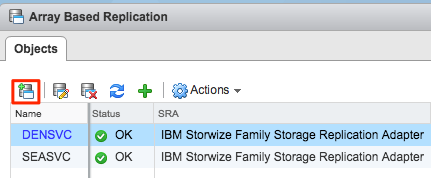
- In the vSphere Web Client, go to Site Recovery > Array Based Replication.
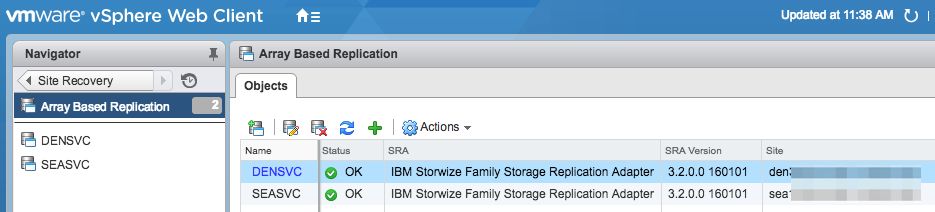
- On the Objects tab in the right window pane, click the icon to add an array manager.
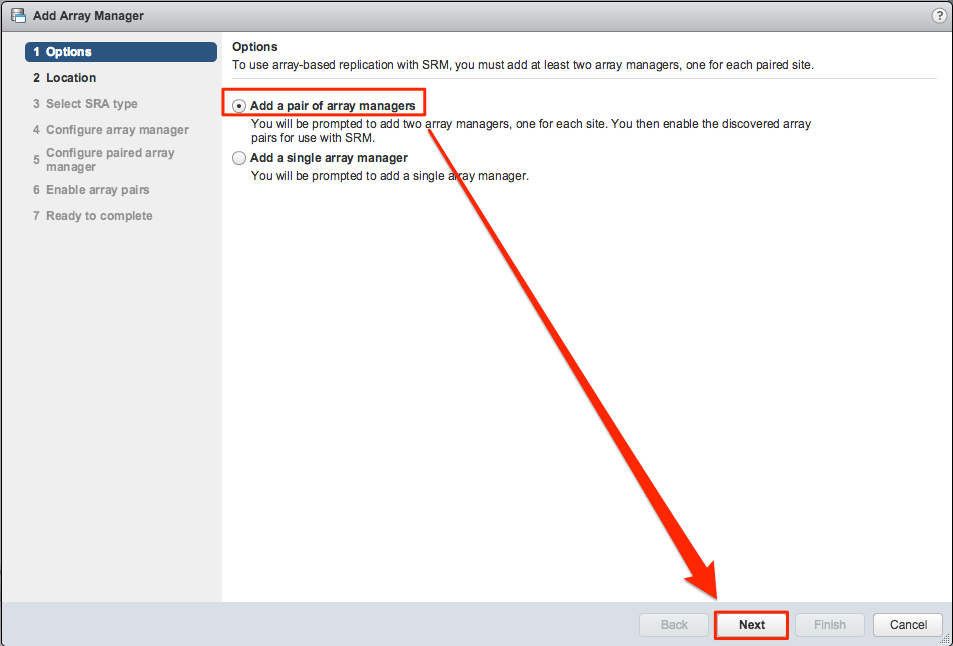
- Select from one of two options for adding array managers (pair or single), then click Next.
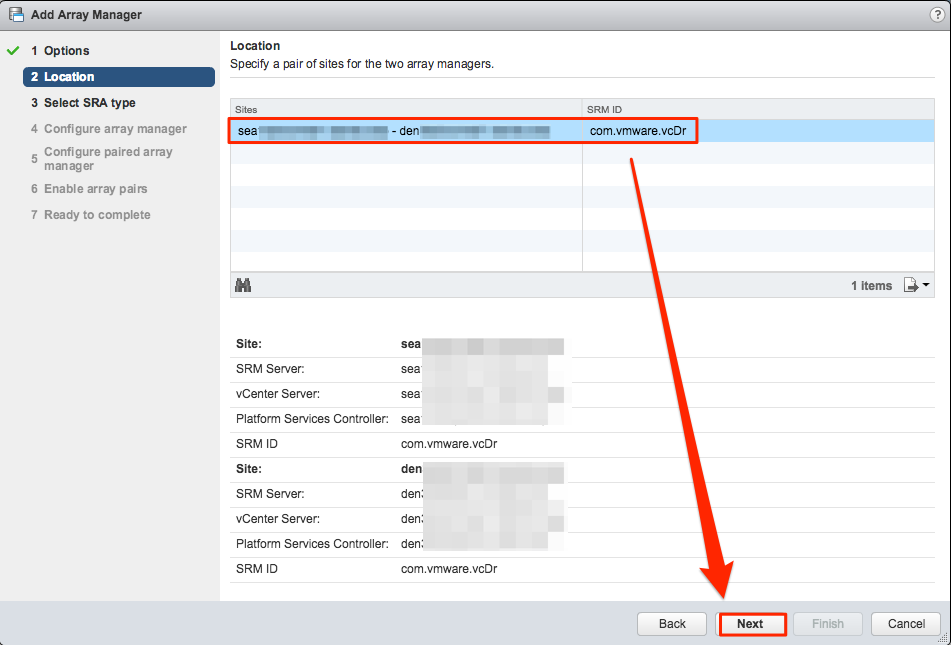
- Select a pair of sites for the array manager(s), and click Next.
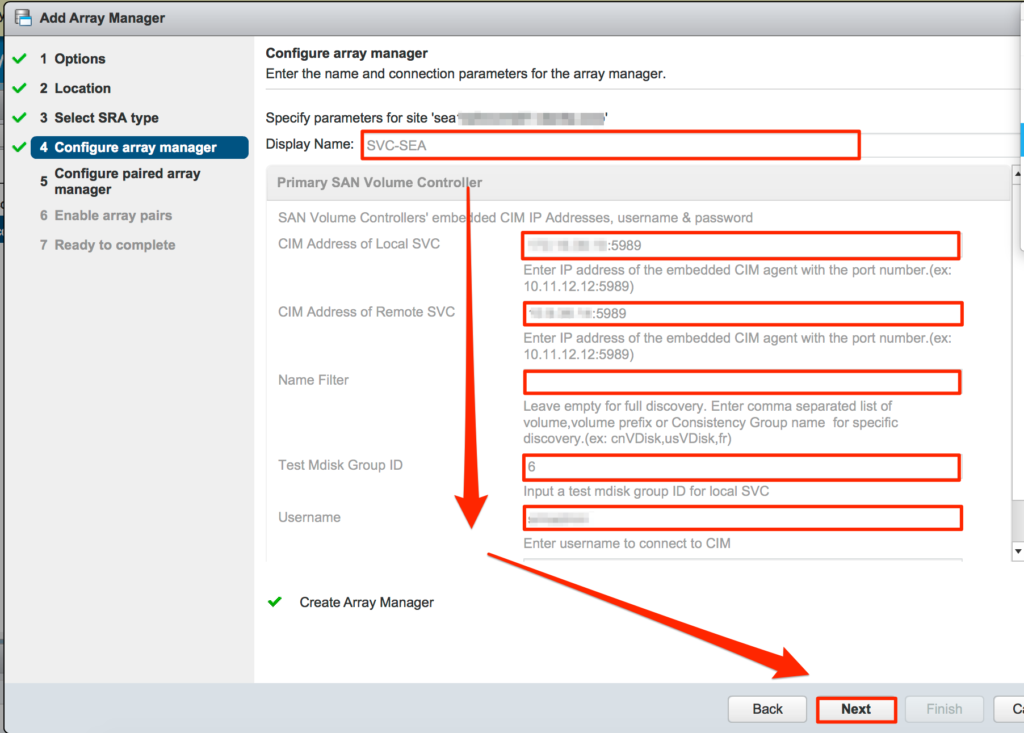
- Enter a name for the array in the Display Name field, and click Next.
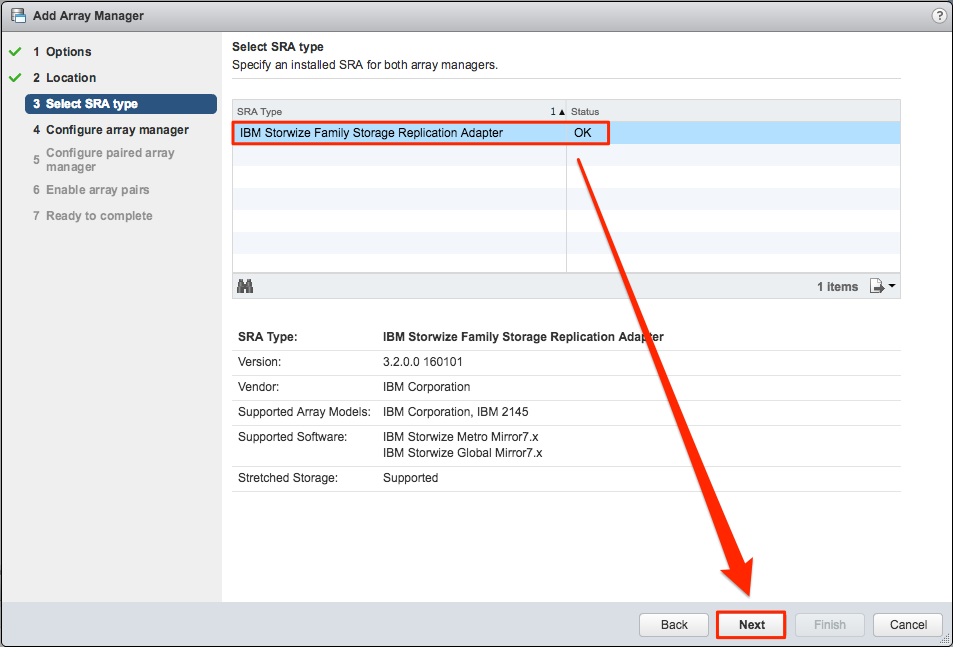
- Provide the required information for the type of SRA you selected, and click Next.
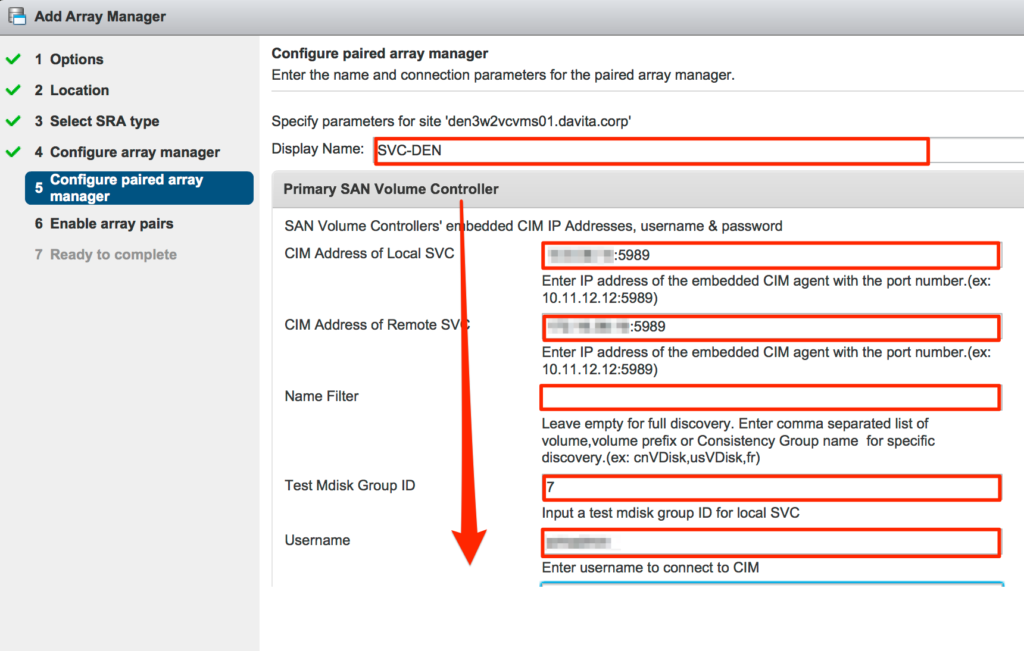
- If you chose to add a pair of array managers, enter the paired array manager information, then click Next.
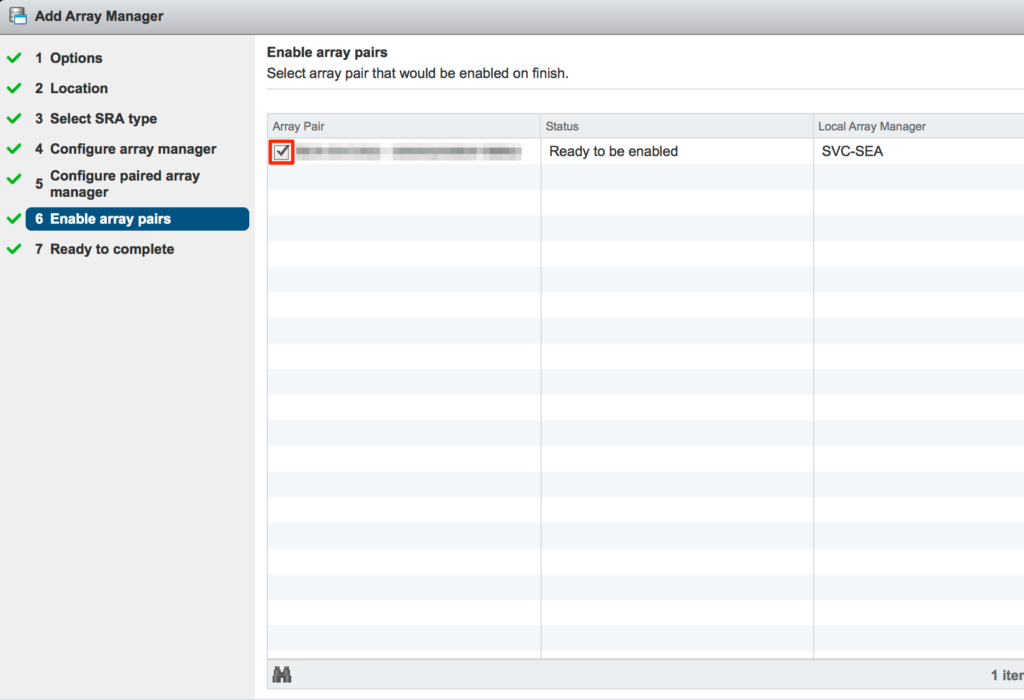
- Click-to-enable the checkbox beside the array pair you just configured, and click Next.
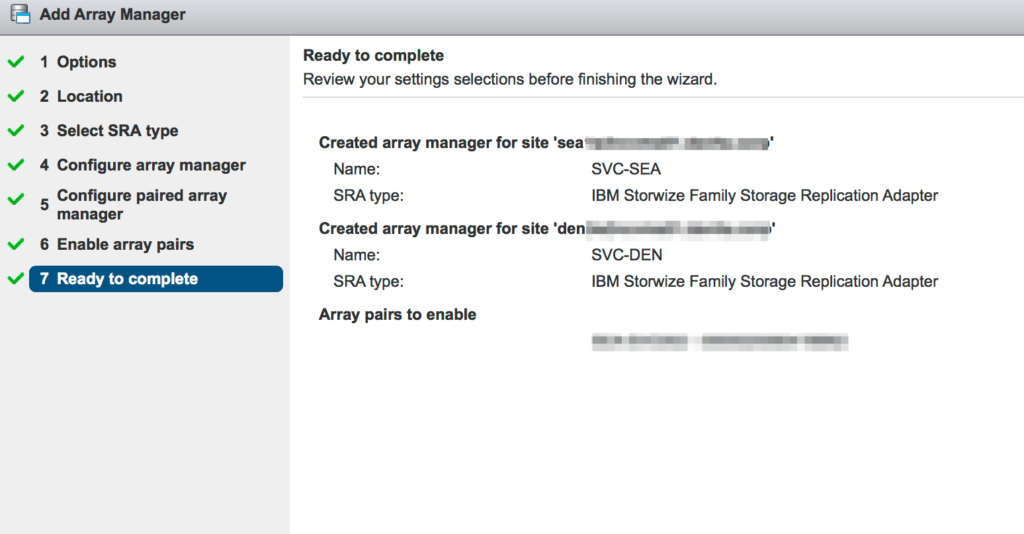
- Review your configuration, then click Finish when ready.
Rescan Arrays to Detect Configuration Changes
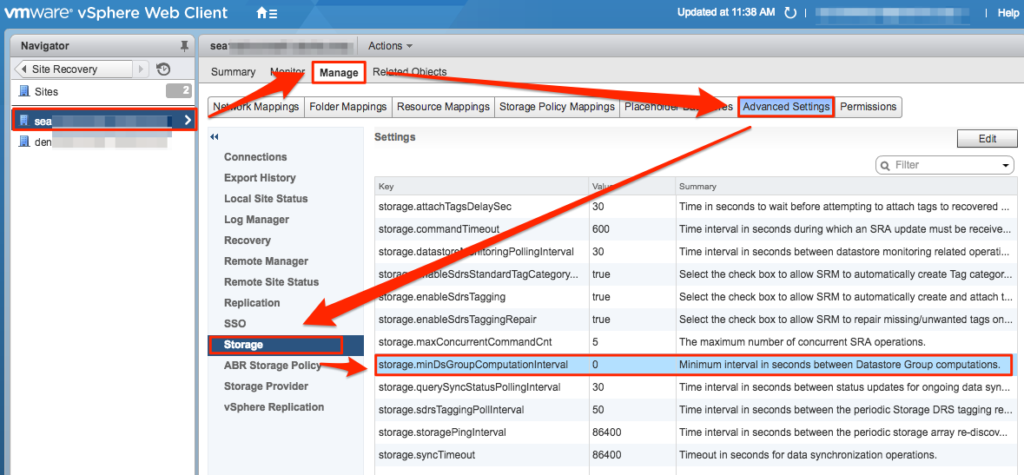
SRM performs an automatic rescan every 24 hours by default to detect any changes made to the array configurations. It is recommended to perform a manual rescan following any changes to either site by way of reconfiguration or adding/removing devices to recompute the datastore groups. If you need to change the default interval at which SRM performs a rescan, you can do this in the advanced settings for each site, editing the storage.minDsGroupComputationInterval advanced setting:
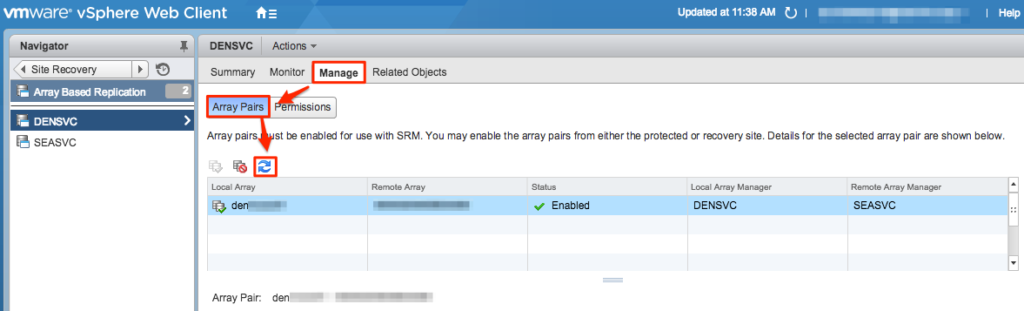
To perform a manual rescan after making any configuration changes:
- Go to Site Recovery > Array Based Replication
- Select an array for either site
- On the Manage tab of the selected array, click the Array Pairs sub tab
- Click the rescan button to perform a manual rescan.
Once you’ve got all of the above configured, you can begin setting up your protection groups and recovery plans.