Did you know that when the Linux-based Zerto Virtual Manager Appliance (ZVMA) was released, the way Zerto handled permissions has completely changed, giving you more control over who has access and what type of access they have?
In the old days (like a year ago, and to some still currently on the Windows-based ZVM), Zerto permissions were really an extension of vSphere permissions. When Zerto got installed on a Windows VM, part of that installation process created roles and permissions within vCenter that you could use to grant users access to certain Zerto functionality, if not all functionality. This was because Zerto mainly relied on whether or not you or any user trying to get into Zerto had an account with access to vCenter. For those who knew about it and used it, it worked, however, it left much more to be desired, like true RBAC and eliminating the possibility for any old vSphere Admin to have complete control over Zerto.
Today, as of the Zerto 9.7 Linux appliance and into 10, managing access in to Zerto has been decoupled from vSphere permissions and brought into Zerto through Keycloak, not to only provide RBAC, but to also provide an additional layer of security and more integration options for access management. Now the only connection into vSphere is a service account, and all user access into Zerto is based on having access granted through Keycloak.
Identity Provider Options
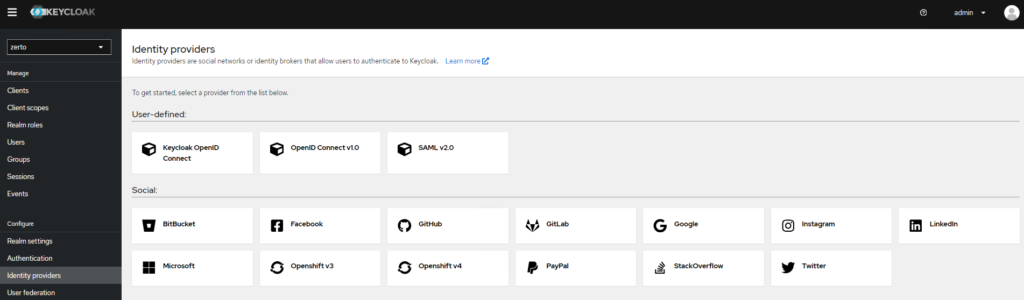
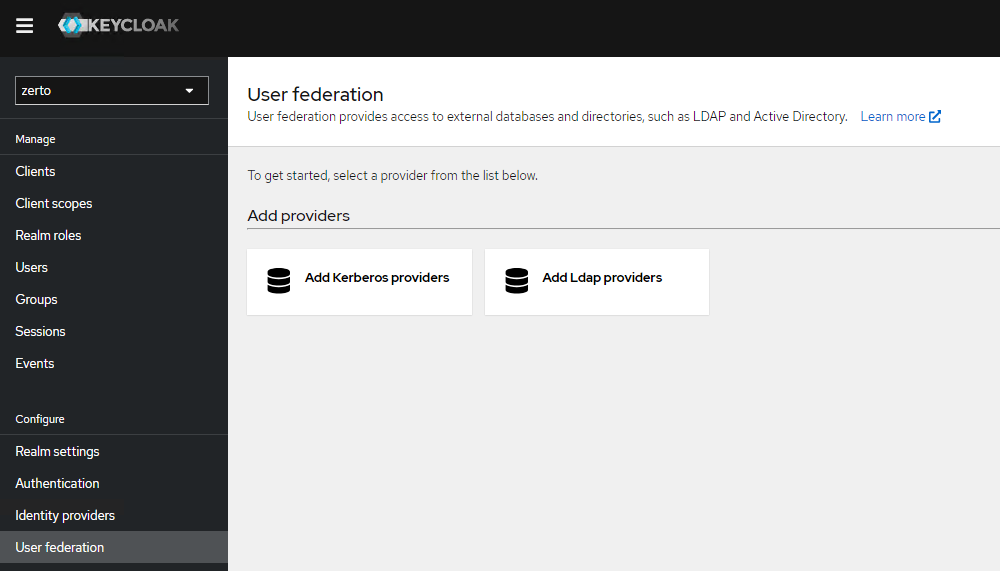
When you take a look at what type of integrations are available with Keycloak, it can be a little overwhelming, however, as long as it has what you need, you likely won’t care for what else is there, right? There are currently 18 built-in options for identity providers and user federation options (pictured below). I’d say there are likely many more when you consider that anything else that can be connected to with OpenID Connect, SAML v2.0, Kerberos, and LDAP/s are also available.
With a plethora of options available, the two most common ones I hear as customer needs today are Okta and Active Directory, and I’ve already published a YouTube video for Active Directory integration via LDAPs, so this update is going to be specific on how to set up Okta integration via SAML v2.0.
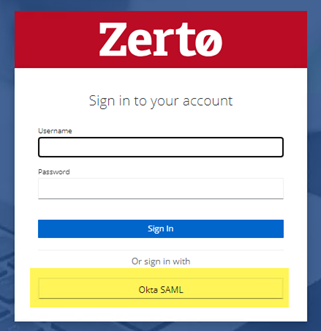
The goal here in this post is to list out the order of operations and the steps required to perform so that when you log in to Zerto, instead of pre-creating an account in Keycloak, you’re going to rely on an existing account in Okta that has access to Zerto, with the added benefit of push-button MFA.
Configuration
Procedure Overview
So I’ve tested this with both OpenID Connect, and SAML v2.0 Identity providers, and I’ve come to the conclusion (and verified with some customers I’ve encountered who were also Okta customers) that configuring this integration via SAML v2.0 is much simpler, and doesn’t require banging head on keyboard. Having no prior experience setting this identity provider up took less than an hour from start to finish, so it was extremely simple.
So if you want to do this in one sitting, there are five main steps in the procedure that I counted.. okay, 6 if you want to include deploying the ZVMA and getting it on the network, which I won’t cover here:
Note: Keycloak and Okta have the tendency to automatically log your session out if you leave them idle for too long, so be sure to keep those sessions active while you’re jumping between the two.
- Deploy, configure, and license the ZVMA
- Configure the SAML 2.0 provider in Keycloak
- Create the Okta Application and download the signing certificate
- Configure mappers to map user attributes from Okta into Keycloak
- Upload and import the Okta signing certificate to the ZVMA and Keycloak trust store
- Logging in to Zerto
One thing to note is that when you’re performing steps 2,3, and 4 above, you may want to have both Keycloak and Okta open at the same time, because there are some values that they will be trading back and forth. Having both open allows you to complete them in parallel and make for a smoother experience.
I will also include at the end of this write up a “next steps” optional but recommended step that comes after logging in for the first time, so be sure to read all the way through, because it will be about RBAC assignment to the Okta user that has been logged in.
If you have any questions, please ask them in the comments.
Configure the SAML v2.0 Provider
- Log into the Keycloak administrator interface on the target ZVMA via https://[FQDNorIP]/auth (replace [FQDNorIP] with the FQDN or IP address of your ZVMA).
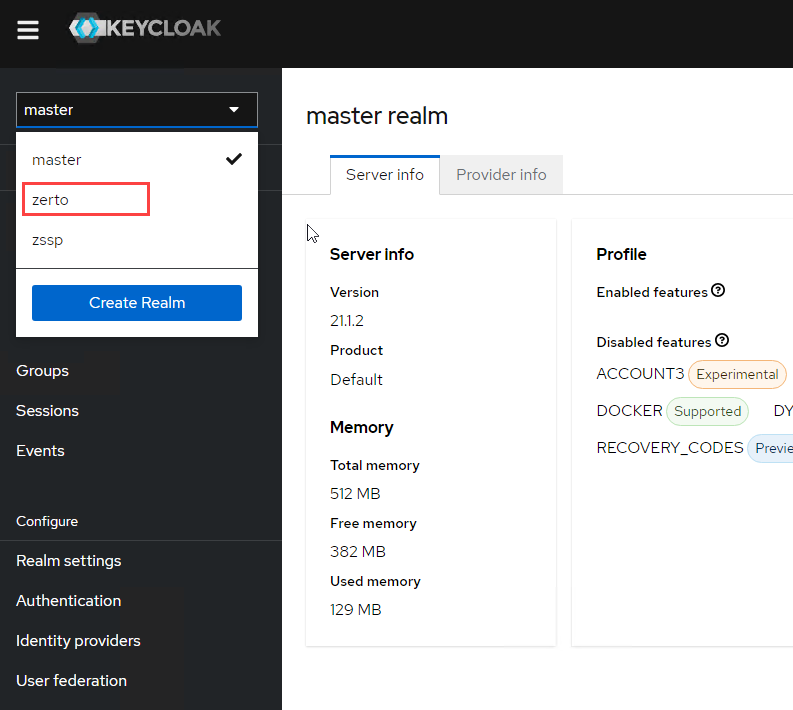
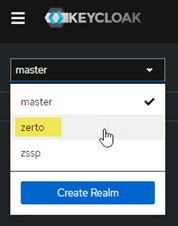
- After you’re logged in, you will see a drop-down list at the top left that defaults to “master.” Click there and select zerto from the list to change into the Zerto realm of settings.
- In the left navigation bar, under configure, select Identity providers.
- From the selection screen, choose SAML v2.0
- Enter the information as shown in the screenshot below, and note that you cannot change the Redirect URI, however, you will need this when configuring the Okta app, so copy it and have it ready to go when you get to the Okta configuration portion below.
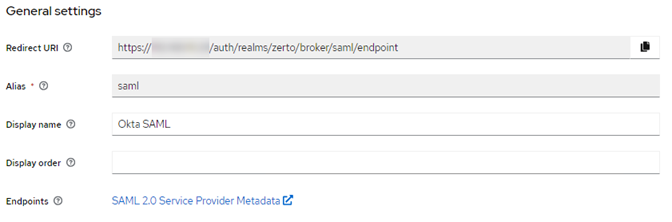
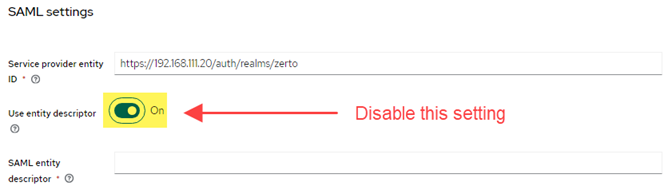
- In the SAML Settings area, disable the setting labeled “Use entity descriptor.” Once disabled, more fields will appear below in the SAML settings.
- Before filling anything out further, open another browser window and log in to the Okta admin site to create an app for Zerto, because now you’re going to need to gather/enter URIs in both Keycloak and Okta.
Create and Configure the Okta Application and Download the Signing Certificate
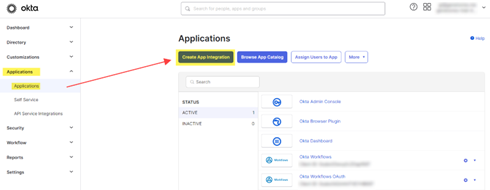
- In the Okta admin, expand Applications in the left navigation bar, and select Applications from the nested options.
- Click on Create App Integration
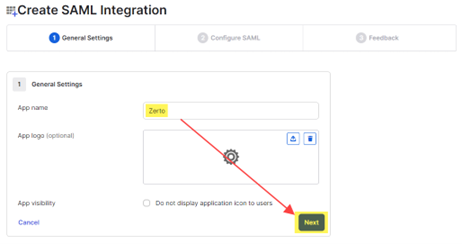
- For the name, enter Zerto SAML, then click Next.
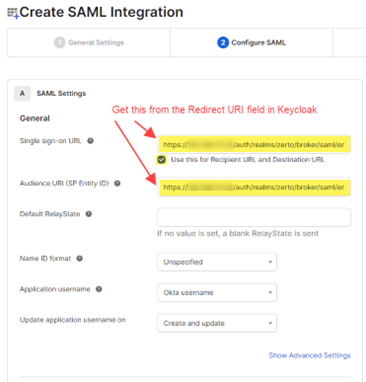
- Under General, where it asks for the Single sign-on URL, enter the Redirect URI that was automatically created in Keycloak. Refer to step 5 above where you started setting up the SAML v2.0 provider in Keycloak.
- Enable the ckeckbox labeled “Use this for Recipient URL and Destination URL.”
- Leave everything else as default, then scroll down and click Next.
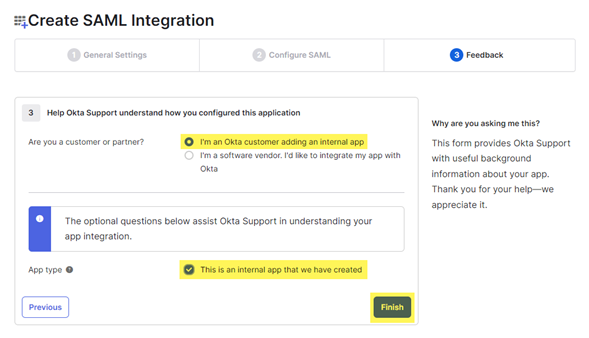
- The next page is for feedback, so select the following options and click Finish. You will be returned to the applications page.
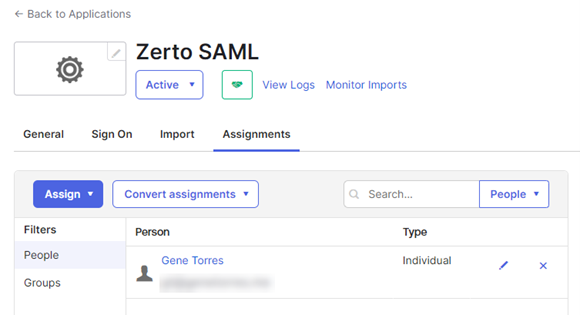
- On the applications page, click the gear icon to the right of the Zerto SAML app you just created, and select Assign to Users.
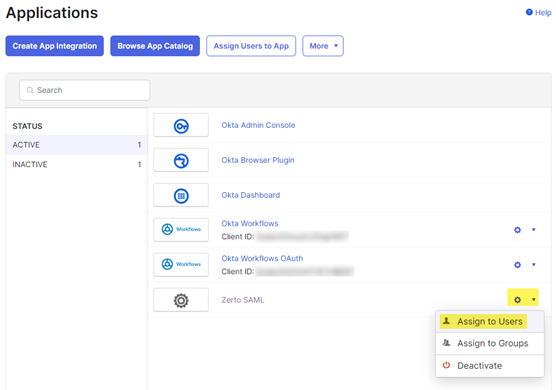
- For each user that requires access to Zerto, click the Assign link to the right of their name to add them to the app. Without assigning them, they won’t be able to login to Zerto using their Okta account. Optionally, you can create a group in Okta and assign your users to that instead of individually here.
- When you click on Assign, another box will pop up with the user name in the box. Click Assign and go back to be returned to the main list of users. If there are more users to add, repeat the previous step, otherwise, you can close the window with the list of users.
- Back on the applications page, if you click on the app, you will see your added users/groups in the list.
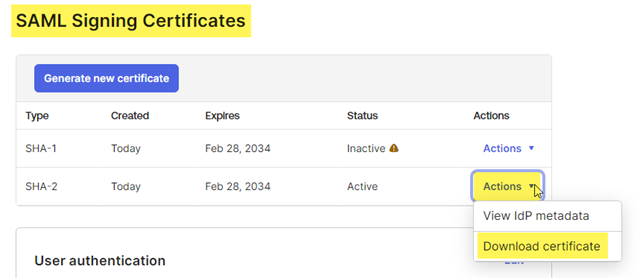
- Now, download the signing certificate. Click on the Sign On tab at the top.
- Scroll down to the SAML Signing Certificates section and find the active certificate. At the right of that active certificate, select Actions > Download Certificate. This is what you will be uploading to the ZVMA and importing to Keycloak, so keep track of it. Save the certificate as a .cert file (which should be what it defaults to).
- Now you need to get a couple of URLs from Okta to use in Keycloak. Click on the Sign On tab for the Okta application.
- Scroll down to the SAML 2.0 section. Beneath the Metadata details header, click on the link that says more details.
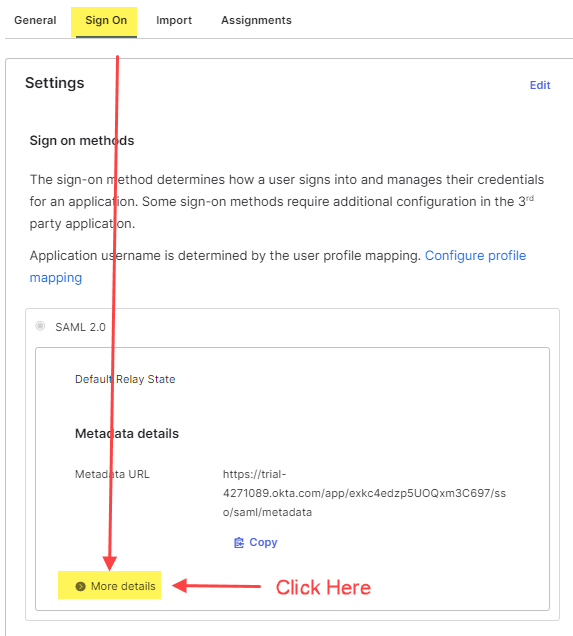
- Copy the Sign on URL and the Sign Out URL
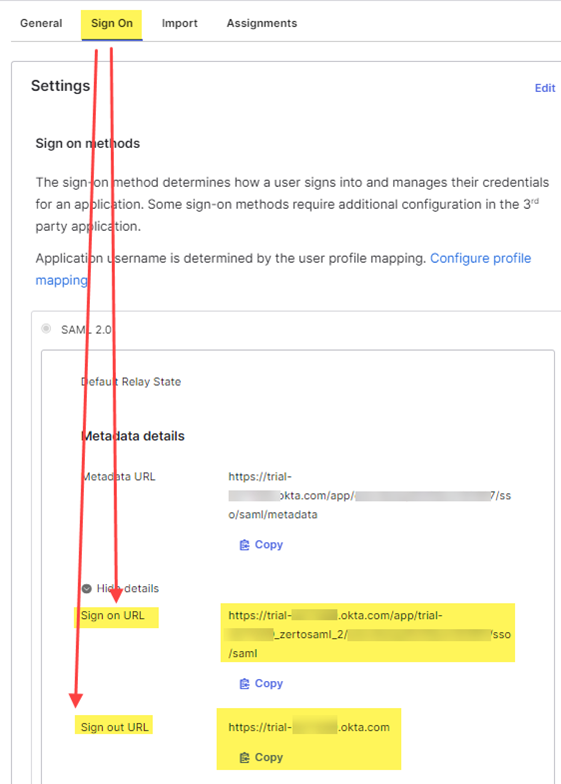
- Now return to Keycloak to continue the SAML v2.0 provider configuration.
Return to Keycloak
- In the SAML Settings section of the SAML v2.0 provider you’re configuring in Keycloak, find the Single Sign On Service URL field and enter the Sign on URL that you copied from Okta in the previous step.
- For the Single Logout Service URL, past the Sign Out URL you copied from Okta in the previous step. When done, it will look similar to the image below:

- Leave all other fields as default. Click Save.
- Scroll down to the Advanced Settings and verify the following settings:
- First login flow: first broker login
- Post login flow: none
- Sync mode: Import
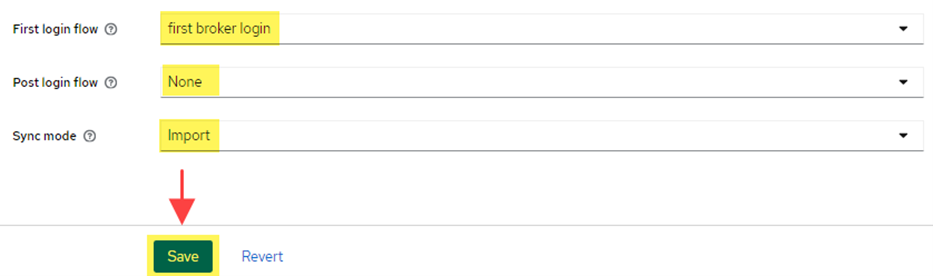
- Click Save.
Configure Mappers for Attribute Import From Okta to Keycloak on Login
Mappers will be used between Okta and Keycloak to easily import user attributes on login to Zerto. If you do not provide mappers, then on first login, the user will be prompted to enter their e-mail address, first name, and last name. The idea with configuring mappers is to bring those attributes over from Okta to populate the fields in Keycloak for the user automatically, so the login is much more seamless.
First we will configure the attribute mapping in Okta, followed by the mapper configurations in Keycloak.
Okta Mapper/Attribute Configuration
- Log onto the Okta administration page.
- Go to the SAML Application that you previously configured in Okta (probably named Zerto SAML).
- On the General tab of the application, scroll down to the section labeled SAML Settings and click Edit.
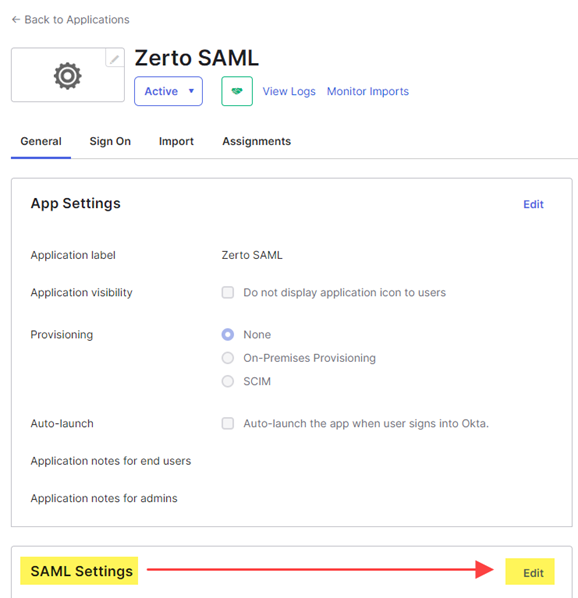
- Click Next.
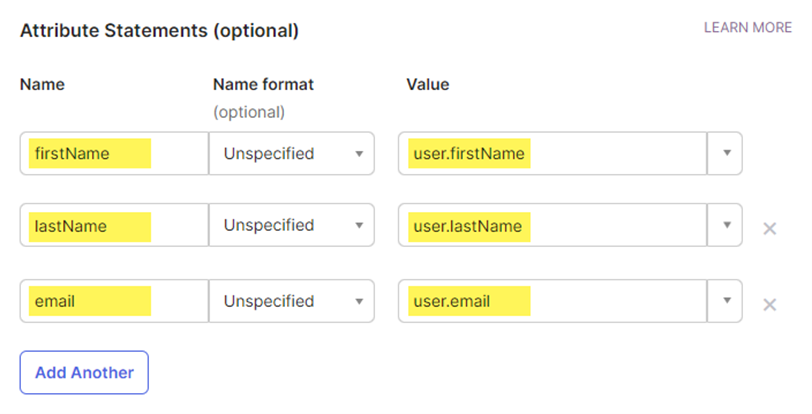
- On the Configure SAML step, scroll down to the Attribute Statements section and add the following attributes. These will map Okta user attributes to Keycloak user attributes for simpler login as mentioned above.
- Scroll down and click Next.
- Click Finish.
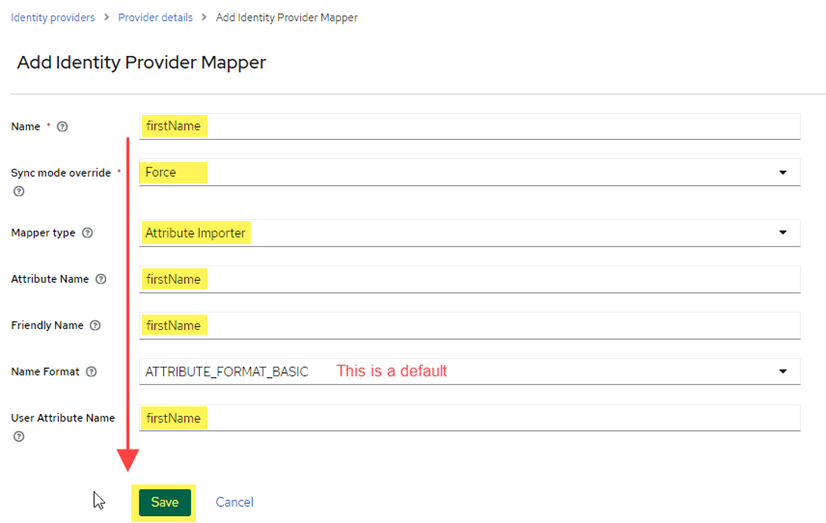
Keycloak Mapper Configuration
Configure the Mappers for users’ e-mail, first name, and last name in Keycloak to be brought over to their Keycloak account automatically on login.
- In Keycloak, click on the Okta SAML provider you configured.
- Click the Mappers tab at the top, then click Add Mapper.
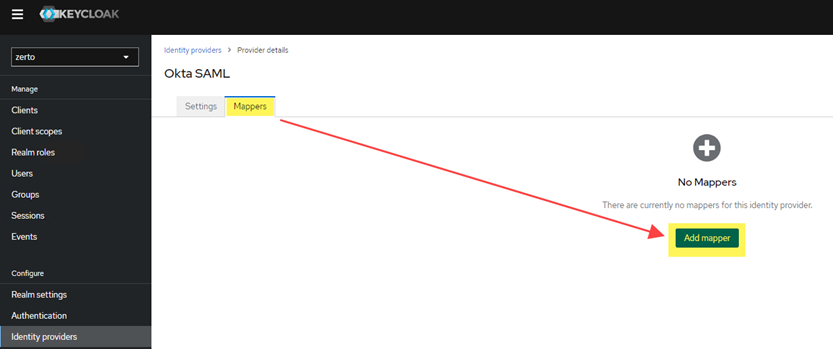
- Add the mapper for the user’s first name. Complete the fields as shown in the image below, then click Save.
- Go back to the Mappers tab, and add another mapper for the user’s last name this time (see image below for values to use). Click Save.

- Go back to the Mappers tab, and add another mapper for the user’s e-mail address this time (see image for values to use). Click Save.
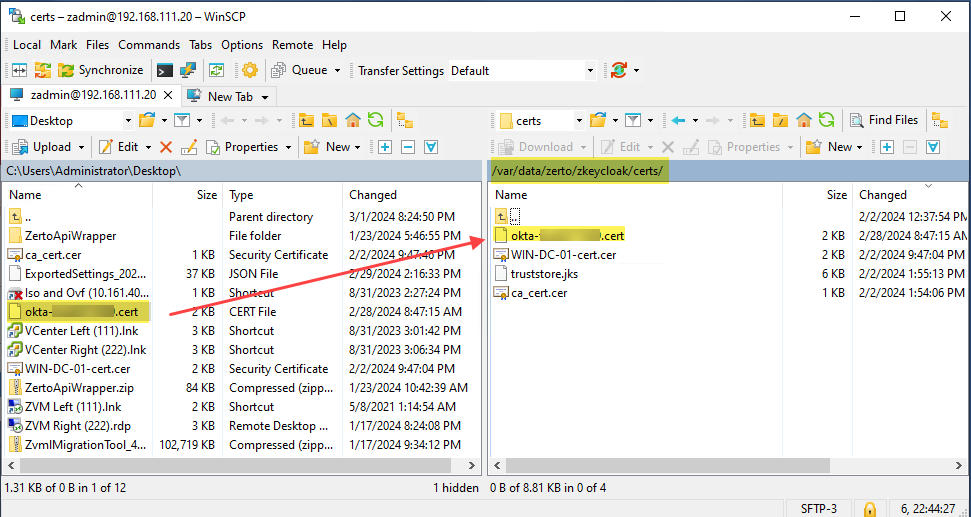
Upload and Import the Okta Signing Certificate to the ZVMA and Keycloak Trust Store
Update: I decided to include the certificate import steps here, but left the link to the original Zerto documentation as others have been asking for it and felt this would be more “complete” with it inline.
- Upload the Okta certificate to the ZVMA. Put the file in the following location: /var/data/zerto/zkeycloak/certs/
- Use PuTTy or other SSH client to log onto the ZVMA. If you are doing this via the vSphere console, select 0 from the appliance manager menu to exit to the shell.
- Run the following command to add the certificate to Keycloak’s trust store:
kubectl exec -i zkeycloak-0 -- /usr/bin/keytool -import -alias oktacert -file /opt/keycloak/conf/certs/[oktacertfilename].cert -keystore /opt/keycloak/conf/certs/truststore.jks - You will be prompted to enter the keystore password. Use the password below. If for some reason you are asked to change that password, use the same one, don’t change it.
truststorepass - When prompted to trust the certificate type yes and press enter.
- Finally, fun the following command to kill the current pod and run the updated one with the certificate in place
kubectl delete pod zkeycloak-0 - You can now end your SSH session and start logging in to Zerto via the Okta SAML login method.
Original Zerto documentation for importing certificates into Keycloak’s truststore:
Next Steps
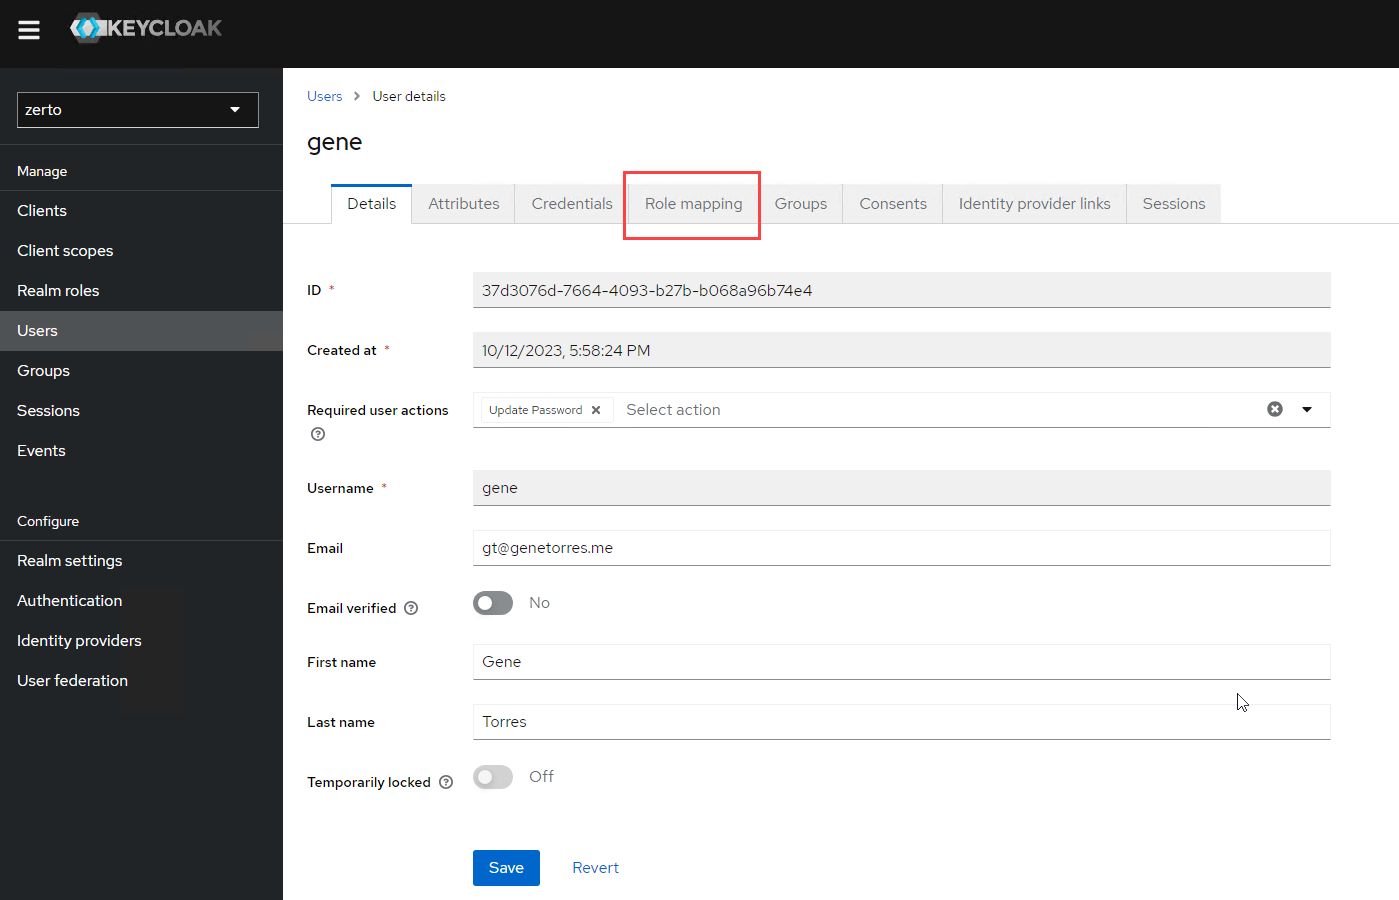
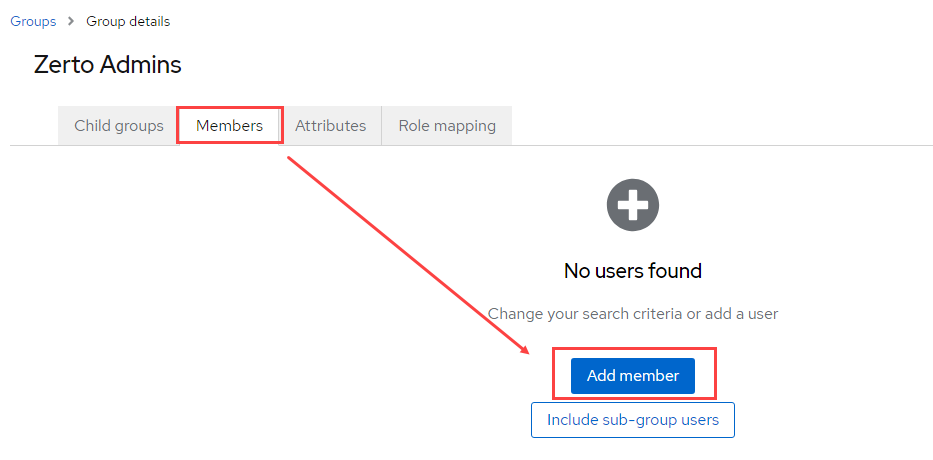
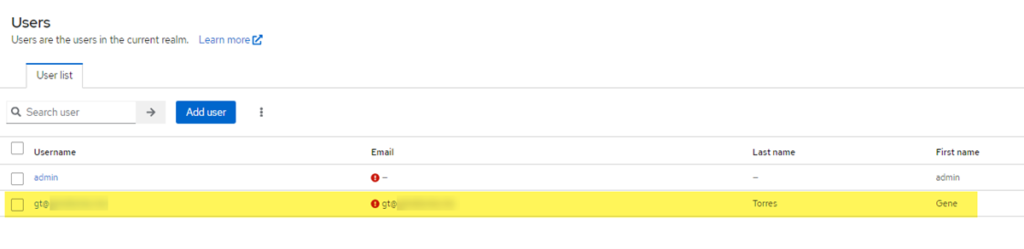
After you’ve completed all the steps previous to this section, you can start logging in to Zerto. One thing to note is that when you login via your Okta credentials, the user loggig in (if given access to the Zerto SAML app via Okta) will be logged into Zerto, and if you look in the Users section of the Keycloak Zerto realm, there will also be an account created in there for the user.
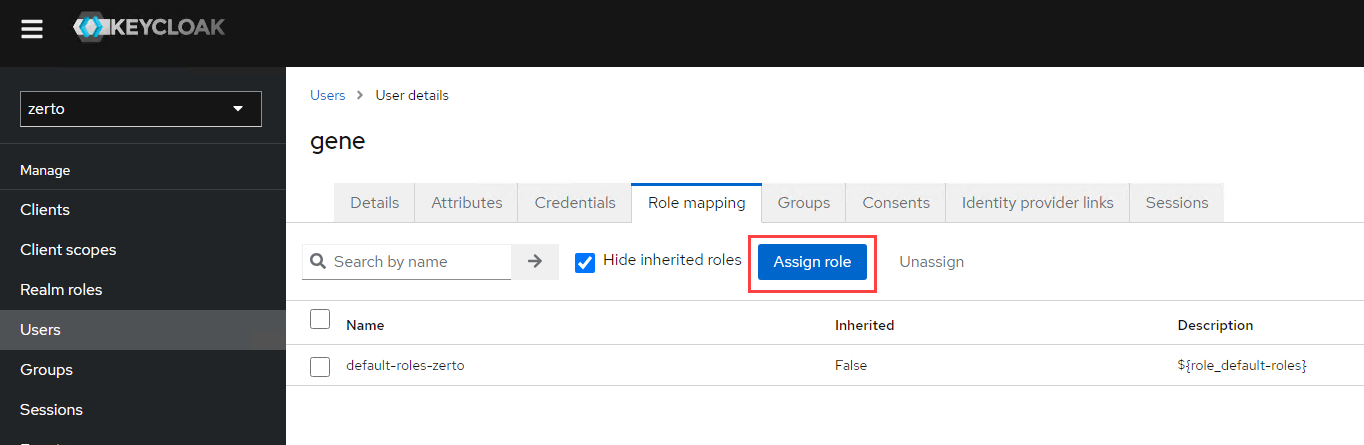
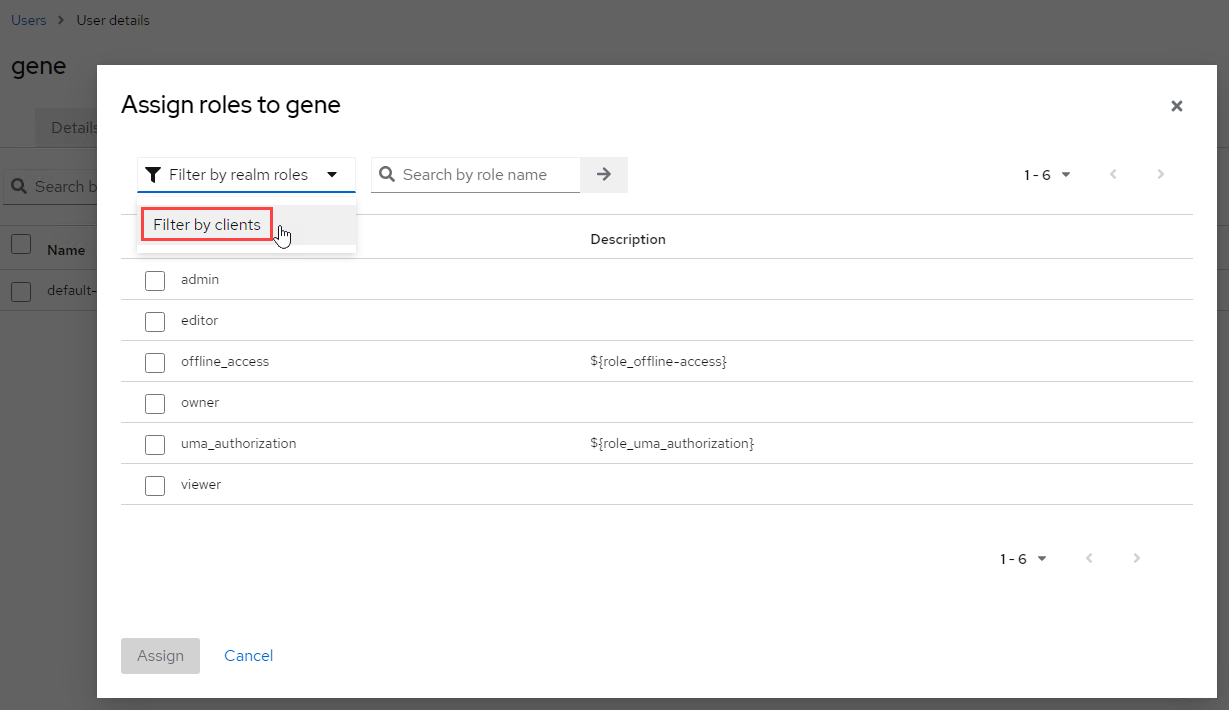
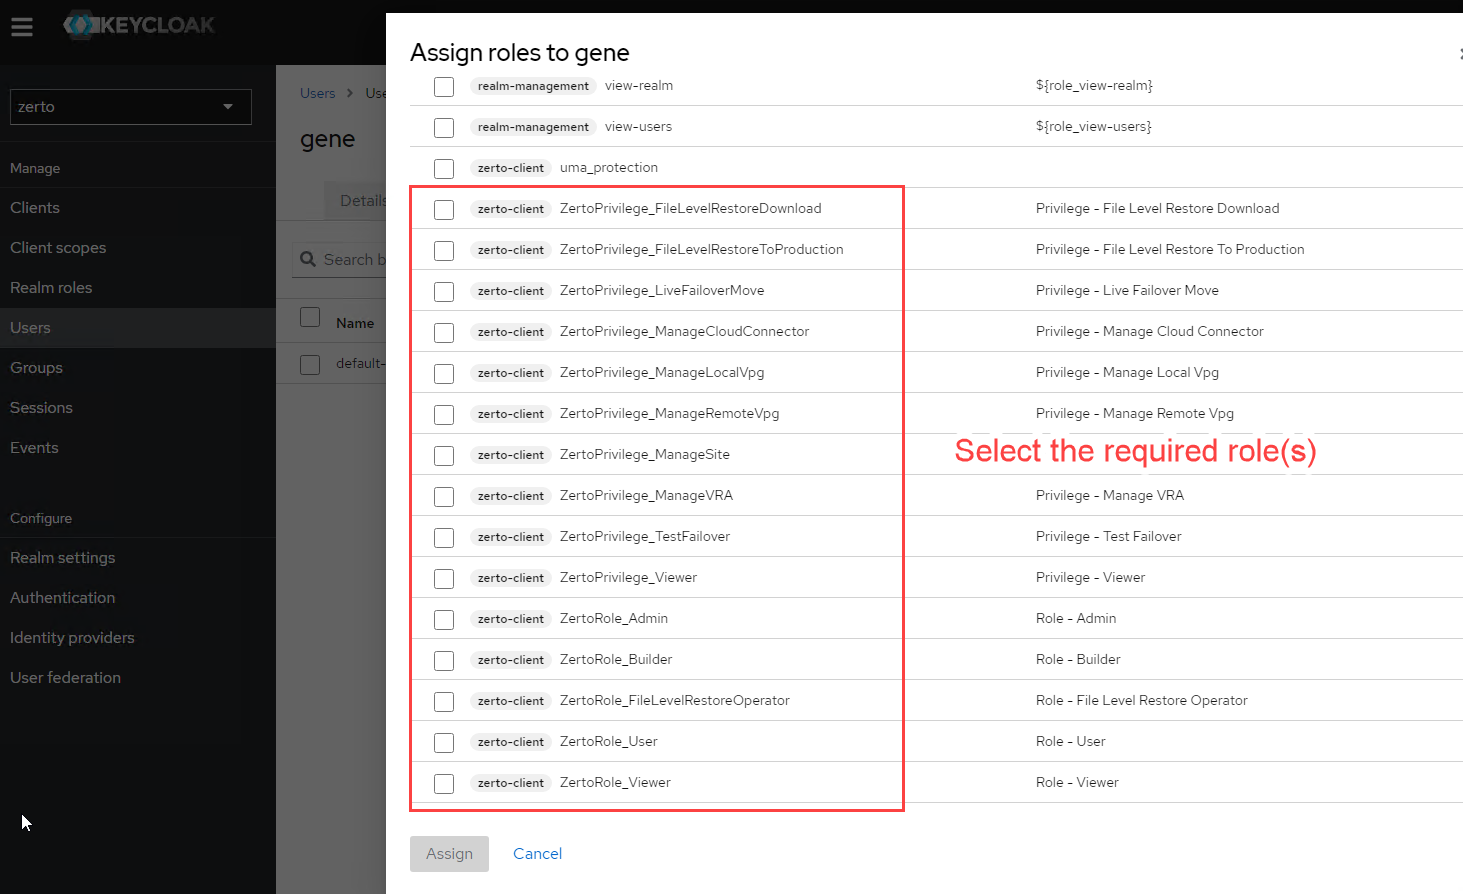
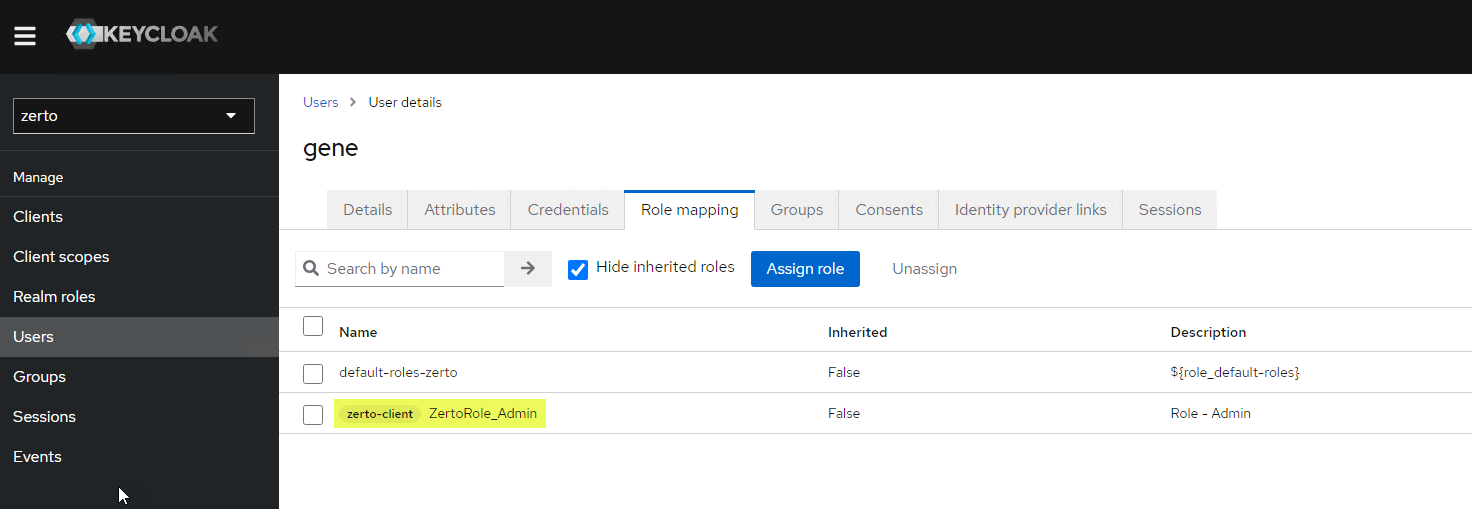
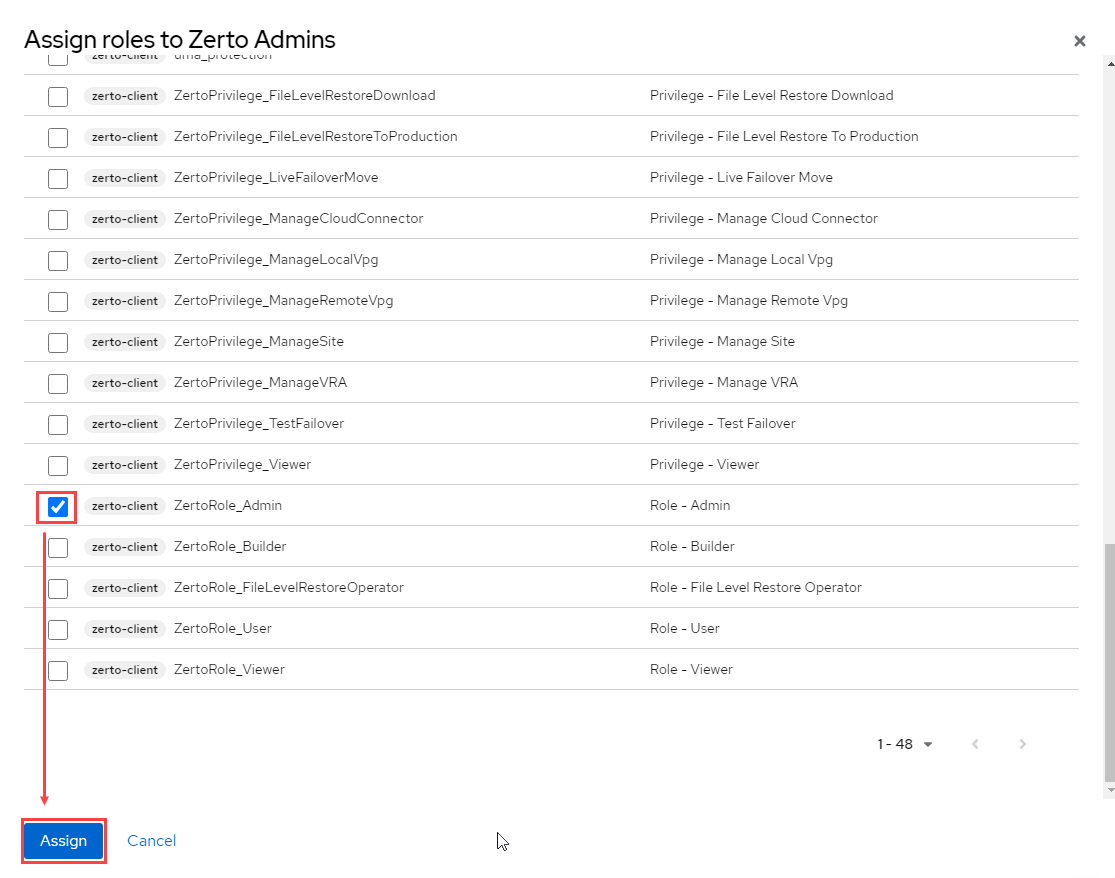
By default, the user being given access through this method will have admin rights to Zerto. If you would like to minimize permissions or access into Zerto with, for example, read-only access, you can visit the following URL where I have previously wrote about how the Role-based Access Controls work within Zerto. Optionally, you can import group attributes from Okta the same way you mapped user attributes, however, that is out of scope here.
Zerto 10 Role-based Access Controls (RBAC) via Keycloak: https://www.genetorres.me/2023/10/13/zerto-10-role-based-access-controls-via-keycloak/
That’s all I’ve got for this time. I hope you’ve found this useful and if so, please share it with others who you feel will find it useful as well. For any questions, please leave a comment!
Update: Mapping Okta Groups to Keycloak Groups
After you’ve gone through this, you’re probably wondering how you can also automatically map Okta groups into Keycloak for Zerto access. Please see my follow-up blog post on Mapping Okta Groups to Keycloak (SAML 2.0) to continue from here and get your groups mapped over automatically. By doing this, you will avoid having to add users to Keycloak groups after their first login.