
So you’ve followed the guide to integrate Keycloak with Okta via SAML 2.0. The next logical step to simplify that configuration would be to automatically map user groups in Okta (if they should have access to Zerto) to corresponding groups in Keycloak to reduce management even more. Guess what? It’s actually pretty straightforward, and the nice part is I have “RH” to thank for taking what I’ve previously done with user mapping and bringing it to groups; so huge shoutout to him for the assist!
Let’s face it, no one wants to manage application access via users, especially at scale. And no one wants to have another step to take once a user logs into something for the first time. By mapping an Okta group to an existing group in Keycloak this will take any additional administrative work to wait for a user to login, only to get denied access, just so the admin can add them to the group to try again.
Properly managing access to applications shouldn’t be a burden. It should be as seamless and without admin overhead as possible. For example, if I’m defined as a Zerto Admin in Okta, when I first login to Zerto, I want to be let right in with the proper access; not have to bug another admin to add me to a group. What if my group membership needs change? It should be able to be done in Okta and then reflected in Zerto on my next login, so we want to also account for group membership updates without any additional work. The following procedure will be the icing on the cake and make your Keycloak/Okta integration pretty much hands-off once you’ve set it up; and you can go back to doing great things again.
Don’t Jump Ahead!
Before you follow this guide, please make sure you’ve already set up the integration (steps are in my previous blog titled: Zerto 10 Keycloak and Okta SAMLv2.0 Integration. You may have also got to the end of my previous guide and followed the link to this one; so if that’s how you ended up here, then you’re right on track!
Create the Keycloak Groups for Zerto Roles
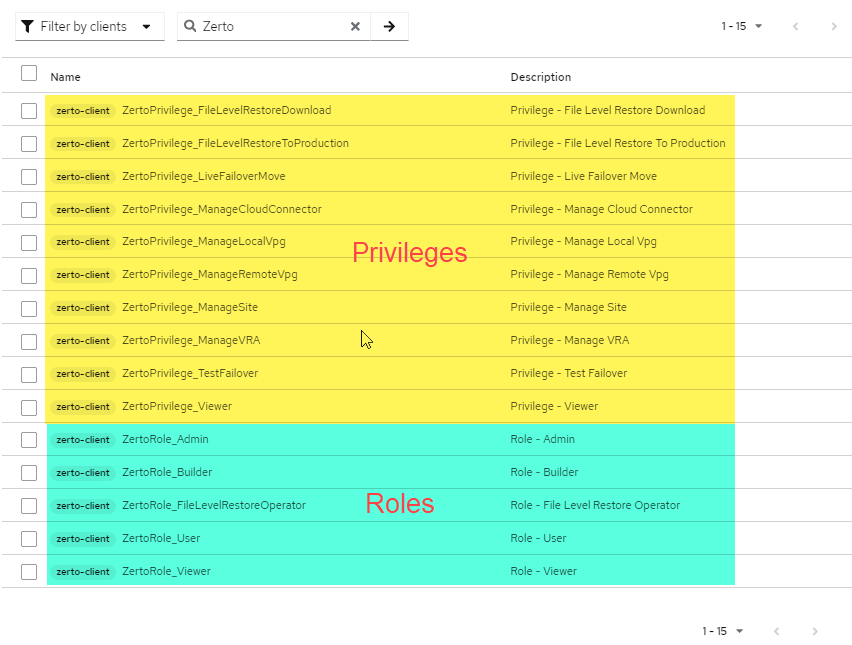
When Zerto is deployed, there are some out-of-the-box pre-configured roles with the necessary permissions attached to them, so that’ll save you some time. You can view what those roles are and what privileges have been assigned to them in this Zerto document: ZVM Appliance Roles and Permissions
For the most part, these are generally all you need, but just know, that if you want to create any custom roles, you can, and Keycloak already contains the privileges within – so you can use what you need if you have to.
Before you start: If you don’t know how to manage Zerto Role-based Access Controls, please see my previously written blog titled “Zerto 10 Role-based Access Controls” and scroll down to the section titled “Managing Zerto Roles by Using Groups” to create the groups in Keycloak if you haven’t already done that.
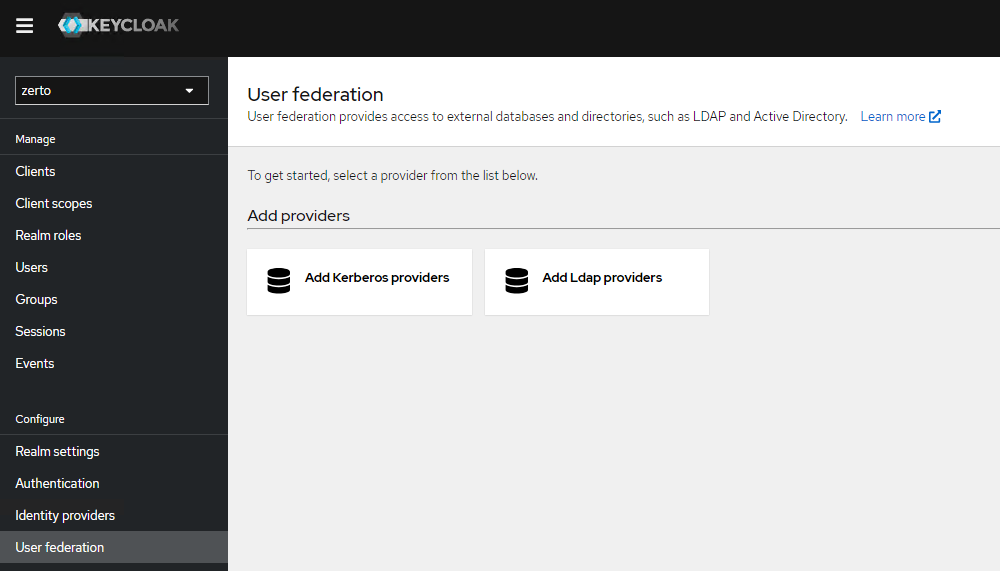
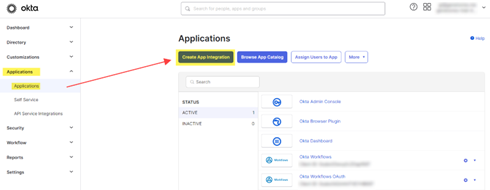
Configure the Okta to Keycloak Group Mapping
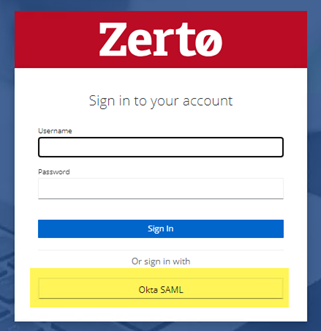
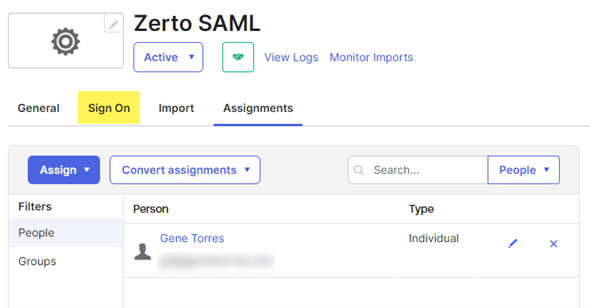
The first thing you want to do here is make sure you’ve already created the groups you need in Okta and added users to that/those group(s). Once you’ve done that, go to the Zerto SAML application you created for the SAML 2.0 provider in Keycloak.
Create the Group Attribute Statement in Okta
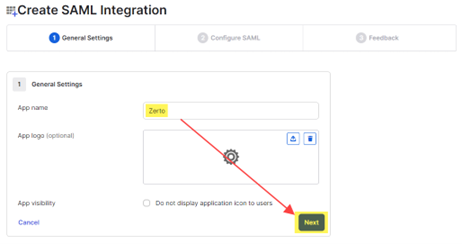
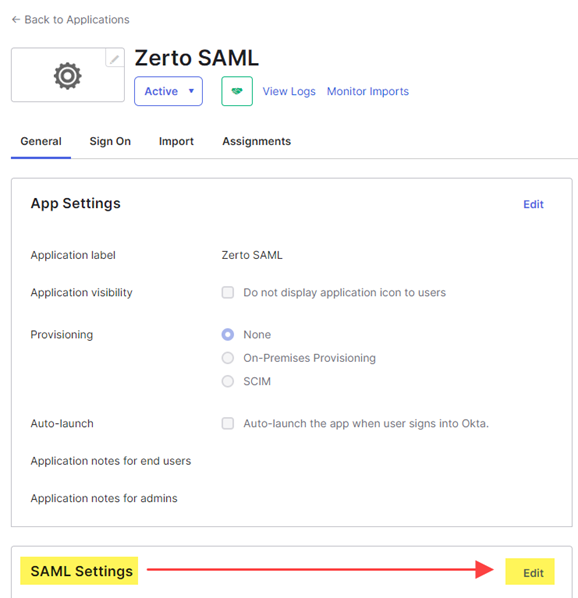
When you get to the app:
- Click on the General tab, then scroll down to the SAML Settings area, and click Edit.
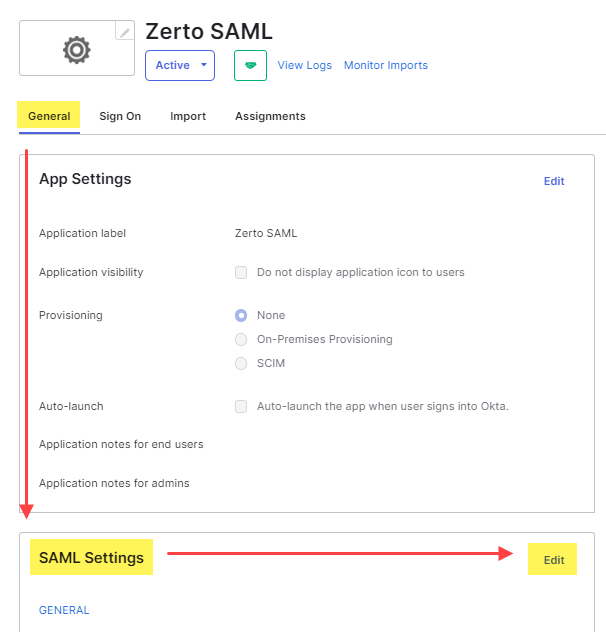
- Under General settings, click Next.
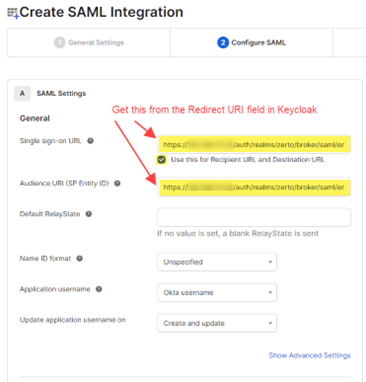
- Scroll down to Group Attribute Statements and for the name, type groups.
- For the Filter, select starts with and enter the prefix for all groups related to Zerto. In my example, I have two groups; one for admins called ZertoAdmins, and one for viewers (read-only) named ZertoReadOnly.
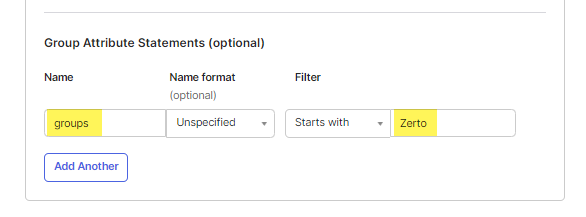
- Click Next, then on the next page, click Finish
- Now switch over to Keycloak.
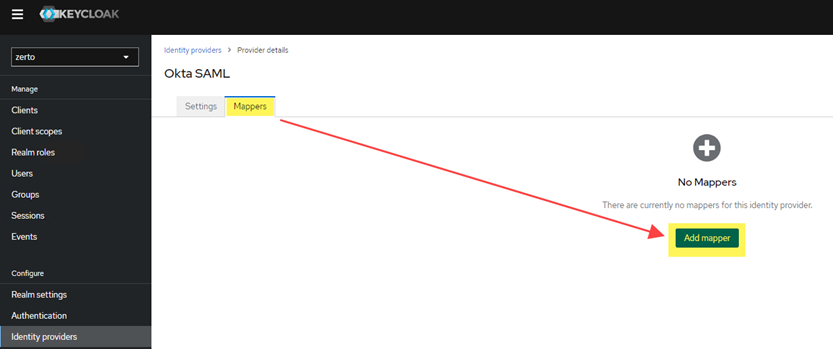
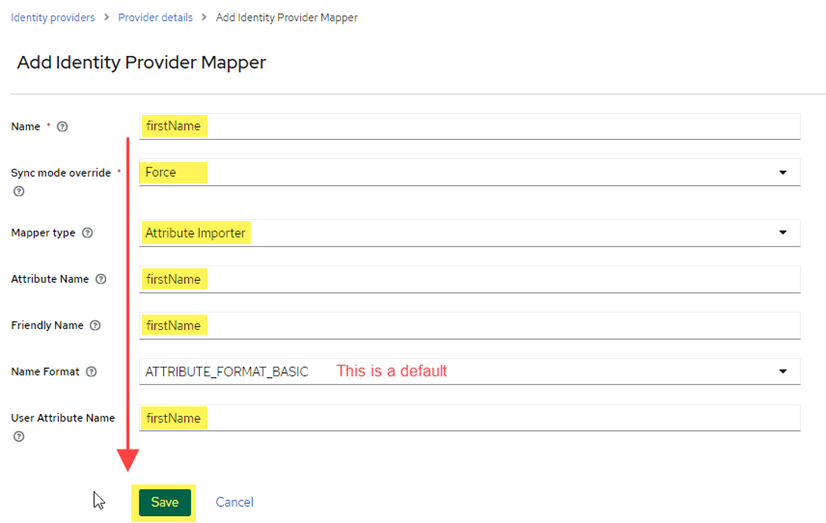
Create the Group Mapper in Keycloak
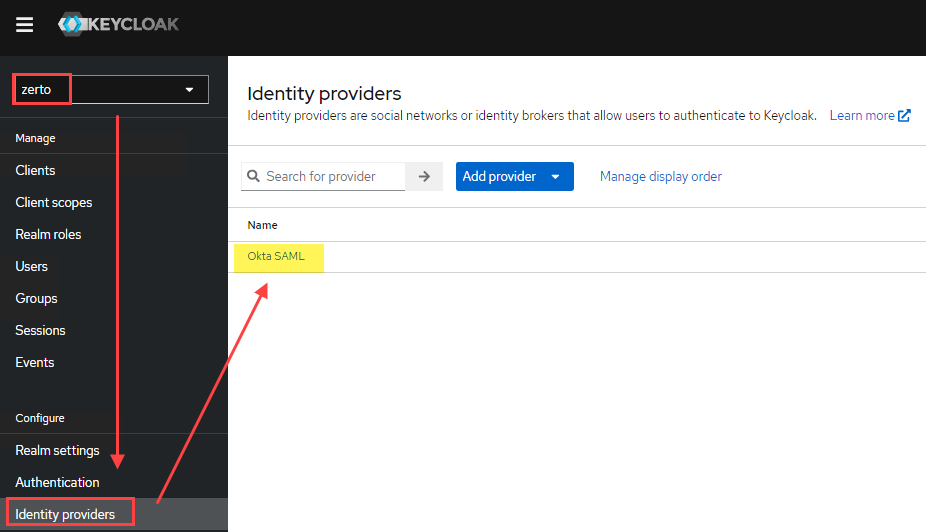
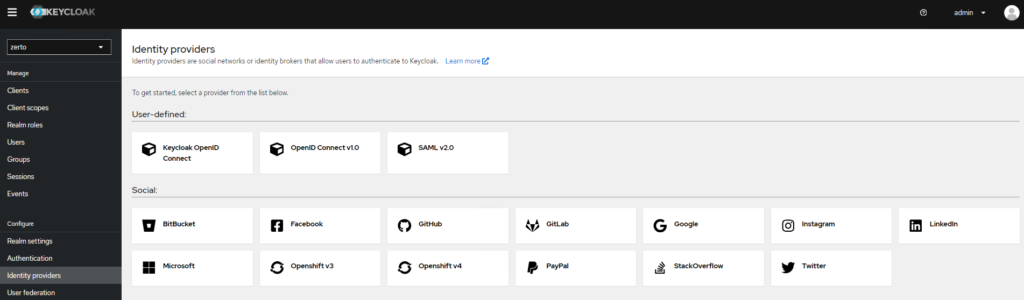
- Log into Keycloak, switch to the Zerto realm.
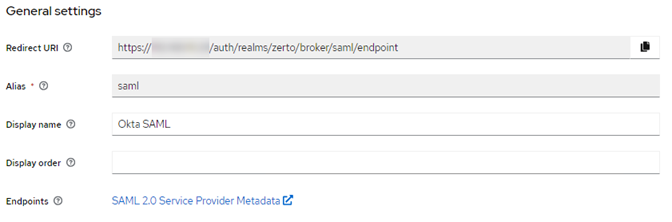
- Click on Identity Providers, then click on your Okta SAML provider.
- Click on the Mappers tab at the top.
- Click Add Mapper.
- Provide a name to identify the mapper (i.e. ZertoAdmins, or ZertoReadOnly)
- Select Force as the sync mode override. This will force an update to group membership if one was made in Okta (i.e. moving a user from the ZertoReadOnly group into the ZertoAdmins group).
- Select Advanced Attribute to Group as the Mapper Type
- Type in the key for the attribute (this is the “name” in the group attribute statement from Okta). This is typically “groups” without the quotes.
- For the Value, input the actual name of the group in Okta (i.e. ZertoReadOnly).
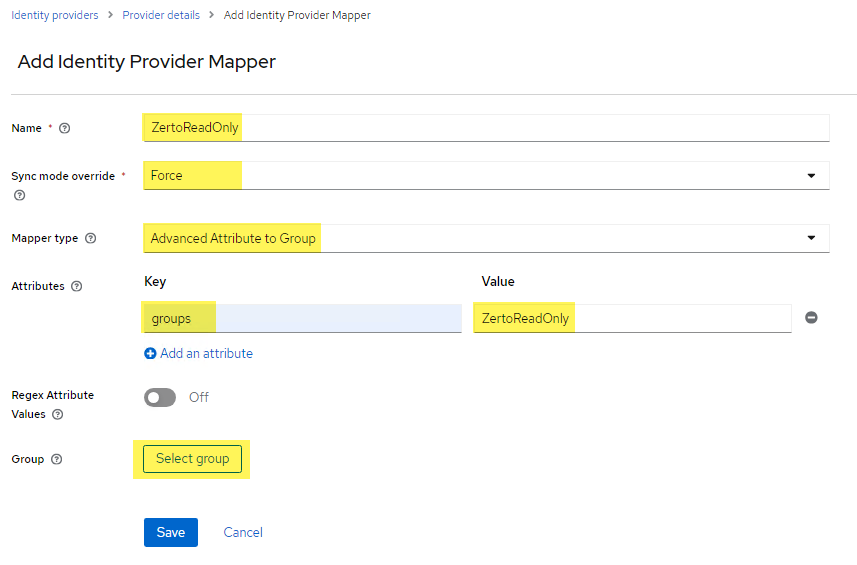
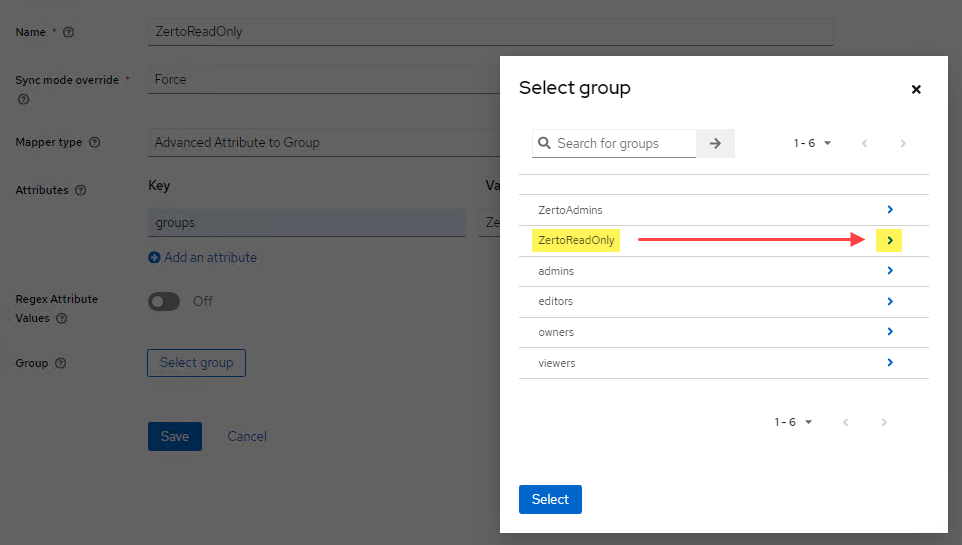
- Click Select group
- Find the group in the list, click the arrow to the right, the click the Select button.
- Click Save.
- Now try logging in to Zerto.
Conclusion and Troubleshooting
After you’ve completed this step to map groups from Okta into Keycloak automatically, Keycloak will look for group memberships in the claims that come through with the login request. If Keycloak sees a match based on the mappers you have set up, then the user will automatically be assigned to the right group/role in Zerto and be allowed access.
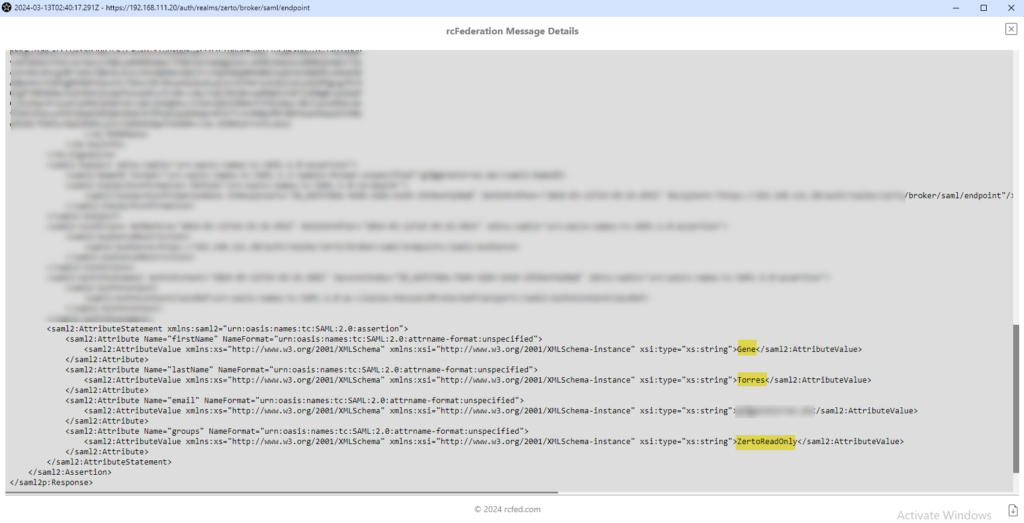
Troubleshooting Note: Make sure when you created the group in Keycloak that you have added the necessary role to the group, because if the group isn't assigned to any Zerto role, then on login that user will get kicked back to the Okta login page.rcFederation Tracer: If you’re setting this up for the first time and want to see what claims are coming through on your requests (again, thanks for the recommendation on this utility, RH!), take a look at SAML, WS-federation and OAuth tracer (installs as a browser add-in) to be able to see what is in your web requests as the communication between Keycloak and Okta take place.
Here’s an example of seeing the attributes Okta passes over to Keycloak on authentication:
Well, I hope this was helpful, and as always, if you have questions or comments, I’d love to hear your feedback. Please also share this with anyone who may find it useful.


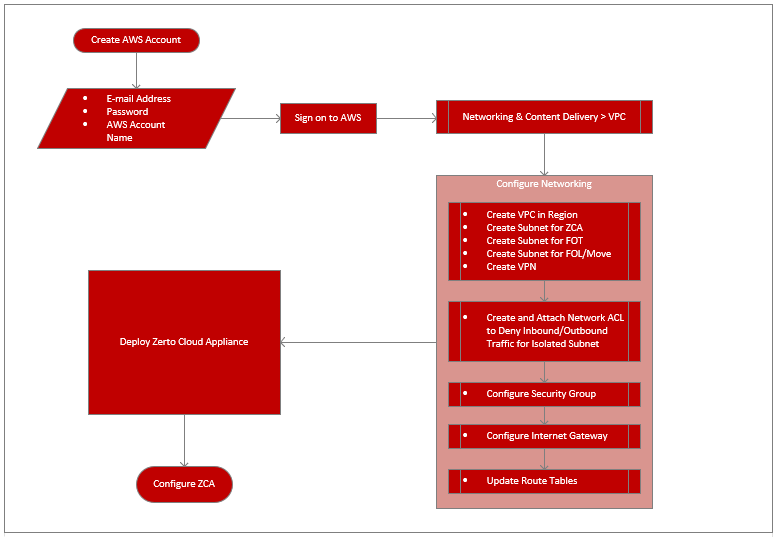
 VM_CheckRequirements > Drop Row”>