Before following any steps in here, be sure to refer to the previous part to this series, which will provide some background information and walk through the steps to install the first PSC and vCenter servers. The steps contained in this post will be a continuation, marking the differences between the initial install (previous post), and the additional PSC and vCenter server.
In this post, I will be walking through joining the second PSC to the SSO domain created previously. Following that, if there are any steps different for the subsequent vCenter Server installation, I will call out any steps in this installation that differ from the first install and include screenshots.
For any pre-requisites, head to Part 1 of this series.
Install the Second Platform Services Controller on a Windows Machine and Joining the SSO Domain
If deploying in a production environment, refer to the vSphere Installation and Setup for vSphere 6.0 Guide.
- Launch the vCenter Server Installer
- Select vCenter Server for Windows, and click Install.
- Click Next on the welcome screen.
- Accept the EULA, click Next.
- Under External Deployment, select Platform Services Controller, and click Next.

- Verify the system name (recommended you use FQDN, not IP Address), and click Next.
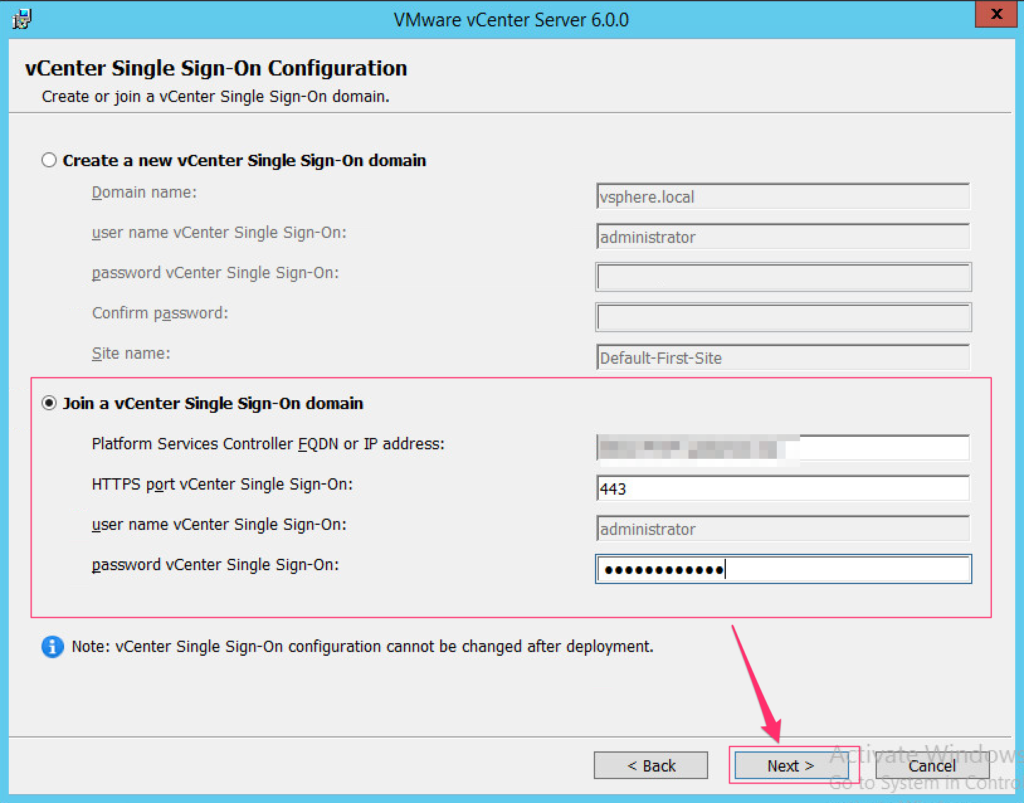
- Select Join a vCenter Single Sign-On domain.
- Enter the FQDN for the first Platform Services Controller that owns the SSO domain you want to join.
- Enter the vCenter Single Sign-On password, then click Next.
- When prompted for Certificate Validation, click OK to accept the self-signed certificate.
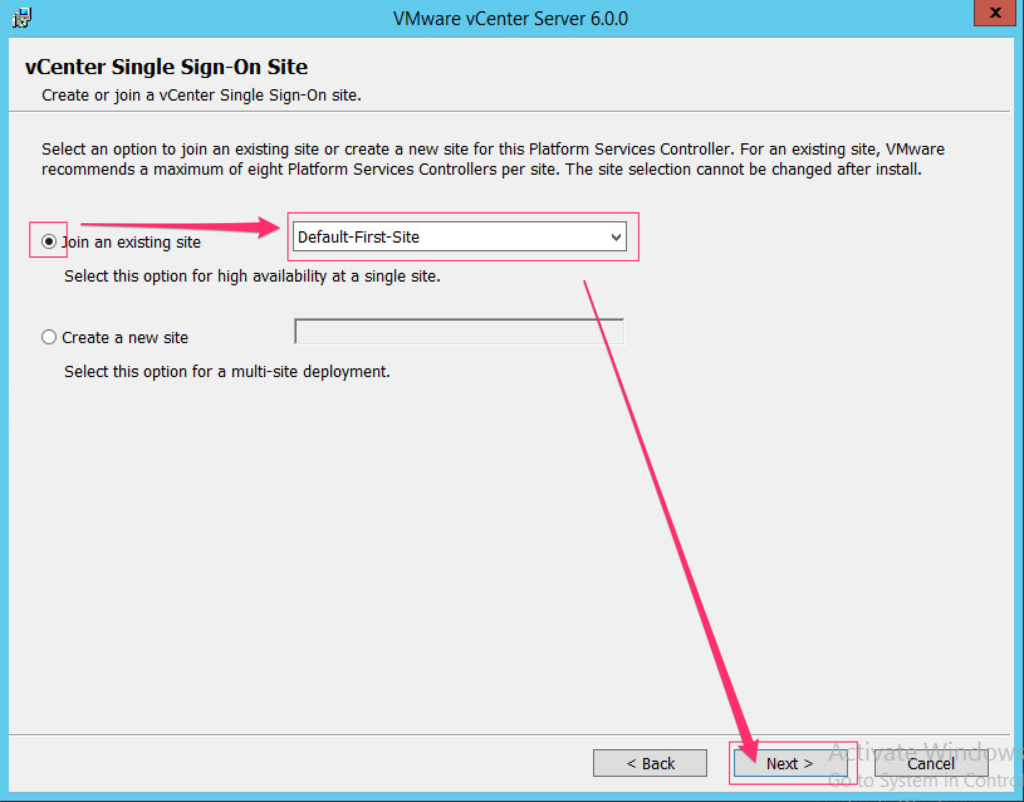
- Select Join an existing site, choose the site from the drop-down menu (should match the site name of the first PSC you created), and click Next.
- On the Configure Ports page, make any changes necessary for your environment, and click Next.
- Set the PSC installation and data directories, and click Next.
- Select whether or not to join the Customer Experience Improvement Program (CEIP), and click Next.
- Verify the installation summary settings, and if all looks well, click Install.
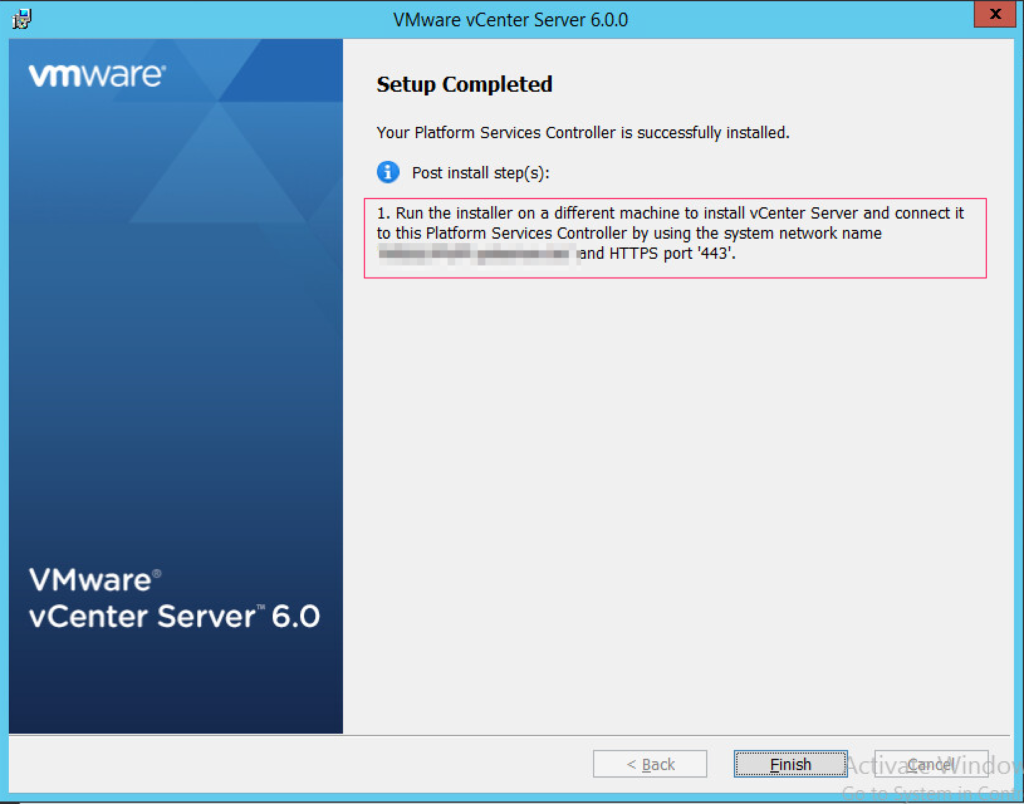
Next Steps
Once completed, run the installer on the vCenter Server that will connect to this PSC, and be sure to connect it to THIS PSC, NOT THE FIRST PSC that was built.
Install vCenter Server and the vCenter Server Components, Connecting to the Second PSC
Perform these steps, making sure to connect this vCenter to the PSC that was just installed above, not the first PSC from Part 1.
Installation
- Launch the vCenter installer and select vCenter Server for Windows. Click Install.
- Once the installer initializes, click Next.
- Accept the VMware End User License Agreement, and click Next.
- Under External Deployment, select vCenter Server and click Next.
- Enter the system’s FQDN, and click Next.
- Enter the information for the external PSC that was deployed in the section above, and click Next. This step will register the vCenter with the PSC.
- When prompted for certificate validation, click OK to approve the self-signed certificate created by the PSC.
- Configure the vCenter service account according to your environment requirements and click Next. If you are using an external database server, you will need to specify a user service account.
Note: If you are using a user service account, you will need to make sure it has the “log on as a service” privilege in the local security policy.
- Select your database deployment and enter information if necessary, then click Next.
- Configure the required ports if necessary to match your environment, and click Next.
- Configure the installation directory for the vCenter Server and data, then click Next.
- Review all settings, and when ready, click Install.
Next Steps
After you’ve completed this setup, you should now have a functional topology, with 2 vCenters each connected to an external platform services controller. The two external PSCs should now also be running in enhanced linked mode, and to verify, you can log into either vCenter, and see that you can also manage the inventory of the other.
I will follow this up with my testing for vCenter repointing and recovering from a failed PSC in this topology.