In a situation where a workload needs to be migrated from a protected to a recovery (or site A to site B) in an effort to change where the production workload runs from, you can perform a VPG move.
From what I’ve seen, in terms of VPG move versus Failover, is that when using the Failover option, there is an assumption that the protected site has failed, so systems may not automatically be cleaned up on the protected site. When performing a move, the protected site is cleaned up as soon as that move is completed and committed unless you select to re-protect the workload in the other direction (can be automatic or manual for commit, maximum time you have to do it is 24 hours, and that is configurable).
One recommendation I have here is that before you perform these steps, perform a recovery test on the VPG you’d like to move to ensure that recovery steps are completed as expected, and that the system is usable at least in a testing capacity.
- Log in to the Zerto UI
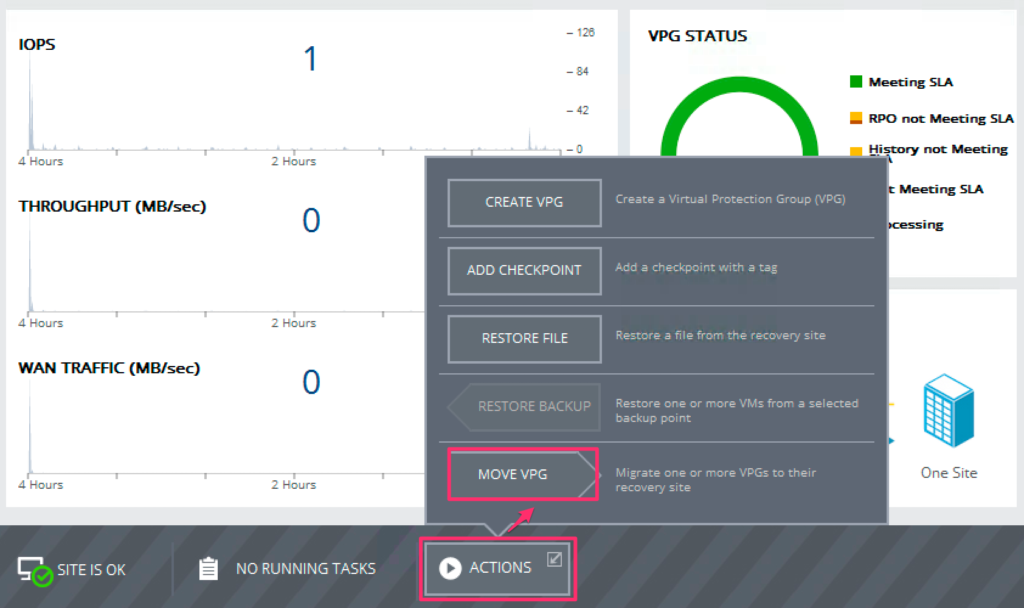
- From the dashboard screen, go to Actions > Move VPG.
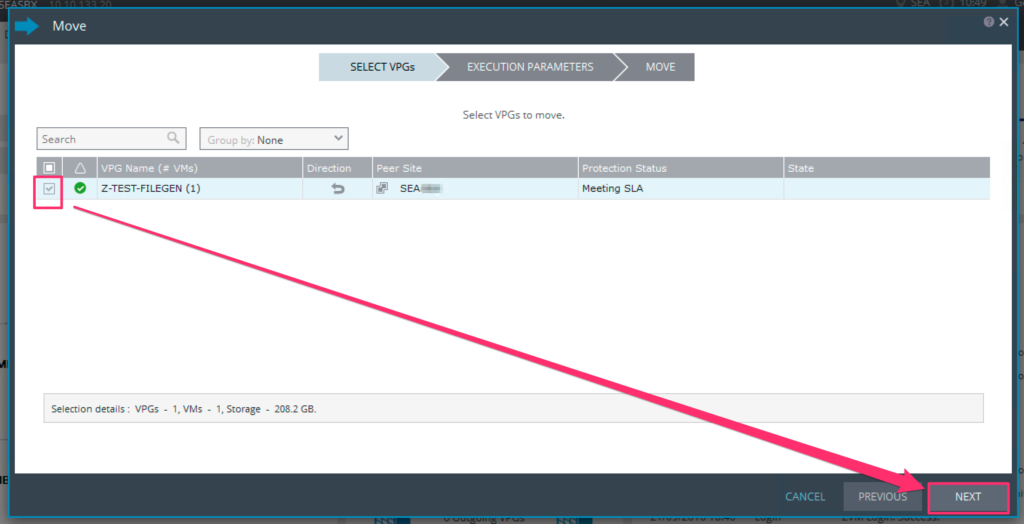
- Select (tick the checkbox) for the VPG you want to move, and click Next.
- Select your options for the Execution Parameters, and click Next. For this example, I will select “none” for the commit policy, to demonstrate where to commit the migration task when you are ready to.
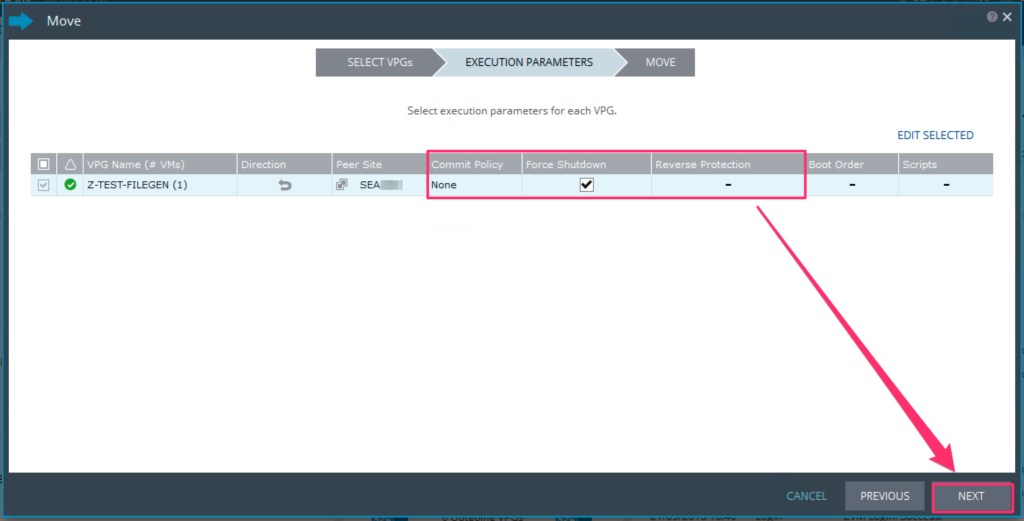
> Commit Policy: Auto-Commit - you can delay up to 24 hours (specified in minutes), or select 0
to automatically commit immediately when the migration process is completed.
> Commit Policy: Auto-Rollback - You can delay up to 24 hours (specified in minutes), default
delay is 10 minutes
> Commit Policy: None - You must manually select whether or not to commit or rollback, based
on your results.
> Force Shutdown - Use this in the event VMware Tools isn't running, therefore, allowing an
automatic shutdown. Force shutdown will first attempt to gracefully shut the VM down, and if that doesn't work,
it will power off the VM on the protected site.
> Reverse Protection - This will automatically sync changes from the recovery site back to the
protected site in case you want to be able to re-protect a system after a migration. This eliminates the need
to have to re-initialize synchronization in the other direction. If reverse protection is selected, a delta
sync will take place to re-protect after the migration is completed. Caveat - You cannot
re-protect if you select "NONE" as the commit policy.
> Boot Order -(Defined in VPG Configuration, but displayed here)
> Scripts - (Defined in VPG configuration, but displayed here)
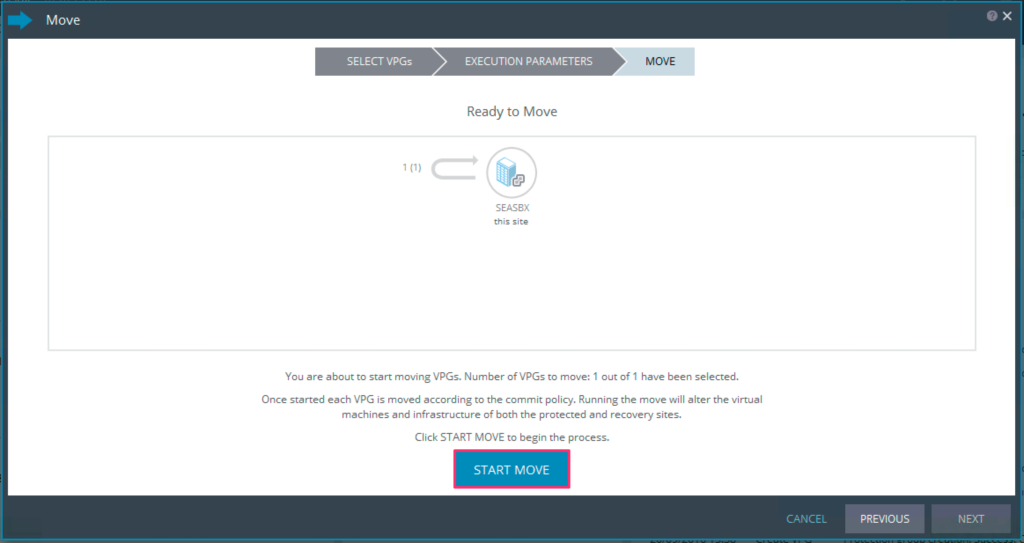
- Review the summary, and when ready, click Start Move.
During promotion of data, you cannot move a VM to another host.  If the host is rebooted
during promotion, make sure the VRA on the host is running and communicating with the ZVM before
starting up the recovered VMs.
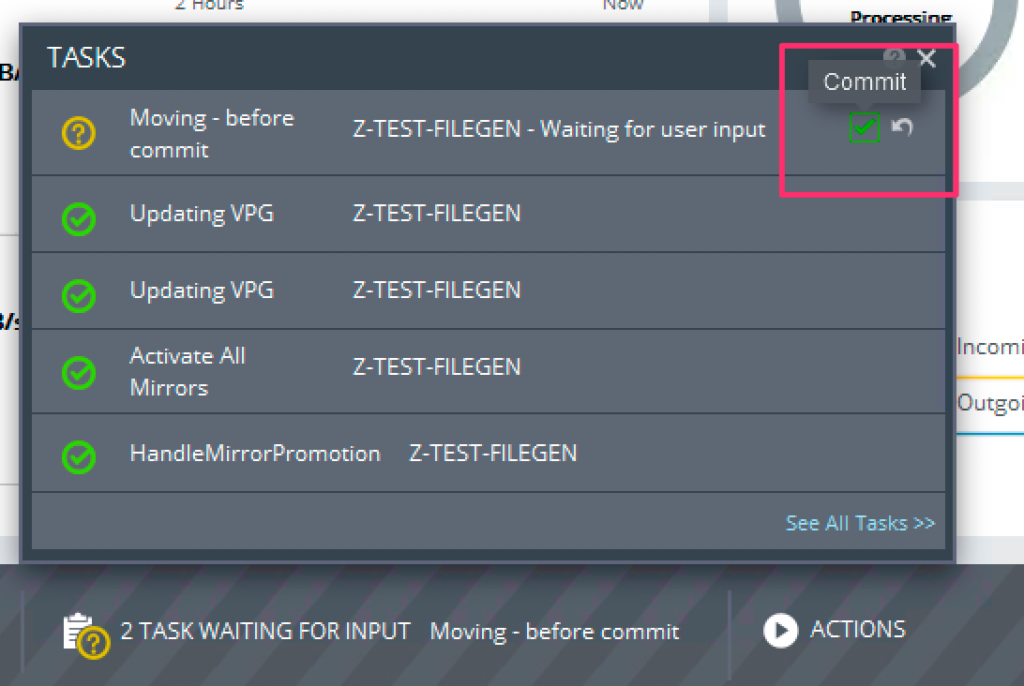
- Since we have selected a commit policy of “none”, once the migration is ready for completion, the Zerto UI will alert you letting you know there is a task awaiting input. Click on the area highlighted below.
 Select to either Commit (checkmark), or Rollback (undo Arrow):
- At this point, you can also choose whether or not to reverse-protect. Make your selection and click Commit.
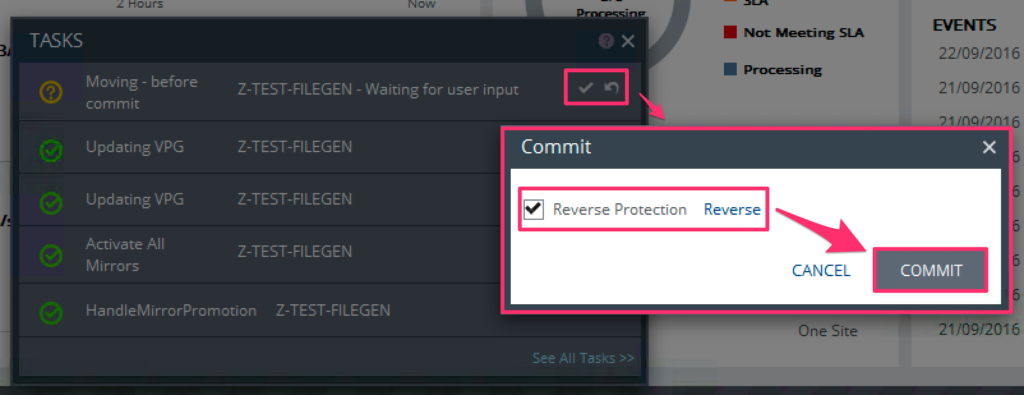 The task will update as seen below:
Once you commit the move, the data in the protected site is then deleted, thus completing the migration.