In Part 1 of “Replace a Failed External PSC in Enhanced Linked Mode”, I worked through repointing a Windows vCenter Server to another External PSC, in an effort to unregister, and rebuild a failed PSC.
In this guide, I will walk through:
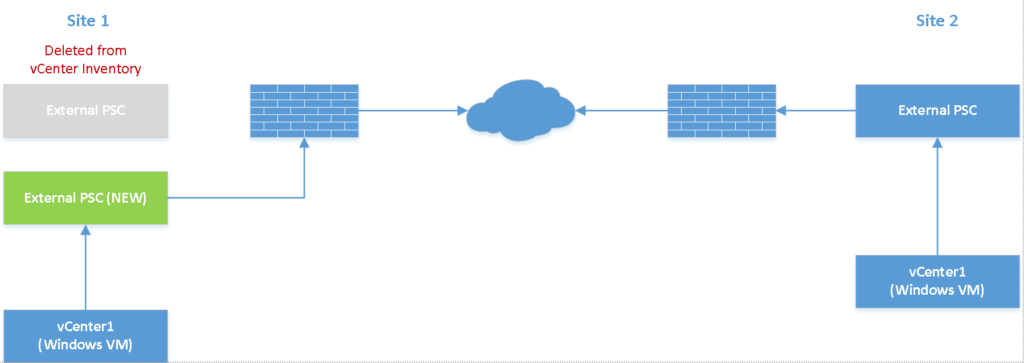
- Building a new Windows external PSC
- Joining the SSO Domain
- Re-pointing VC1 back to this newly-built, and linked external PSC, therefore, returning us to the original topology we started with (except for the server name)
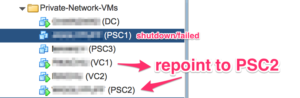
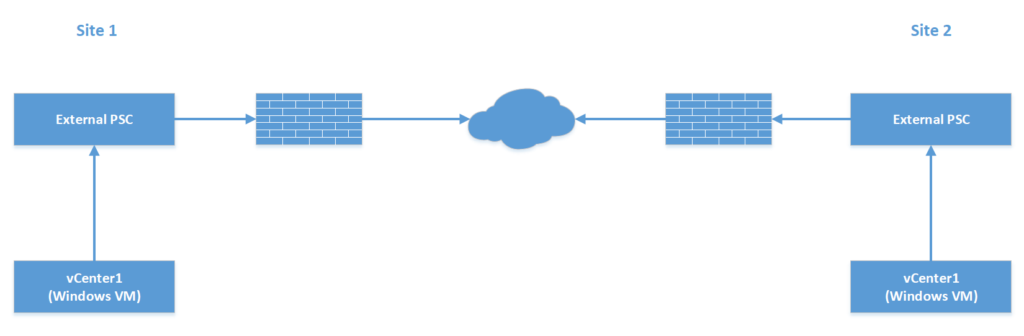
The main systems I’ll be working with in this guide are:
- VC1 (Windows vCenter that was re-pointed to working PSC for other site while we rebuild it’s home PSC)
- PSC3 – This is a newly built Windows Server 2012 R2 PSC that is taking the place of PSC1.
I would have chosen to use the same name of the original PSC, but from experience, it’s always better to be safe, and not try to re-introduce a problematic record into the environment, just in case there are still entries hanging out somewhere in the working configuration.
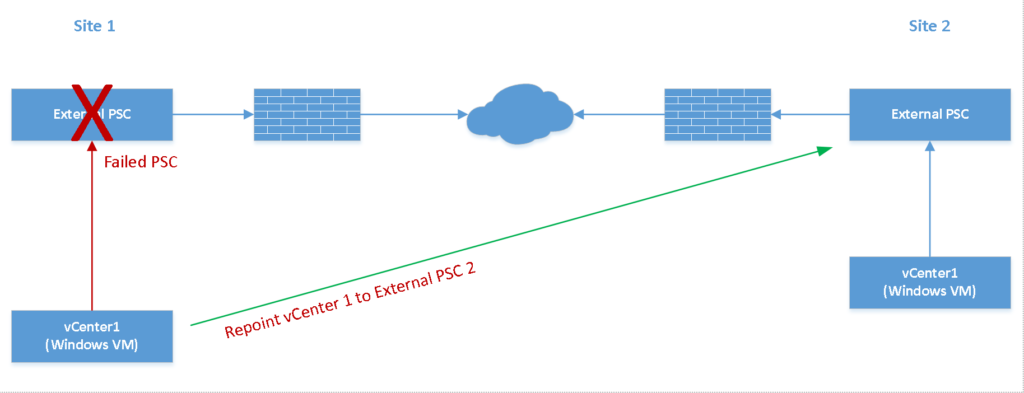
At the end of this guide, we will end up with this topology:
Install the External PSC Role on the New Server
Note: These steps are the same ones to deploy the second PSC in “Deploying Windows vCenter with External PSCs in Enhanced Linked Mode: Part 2.”
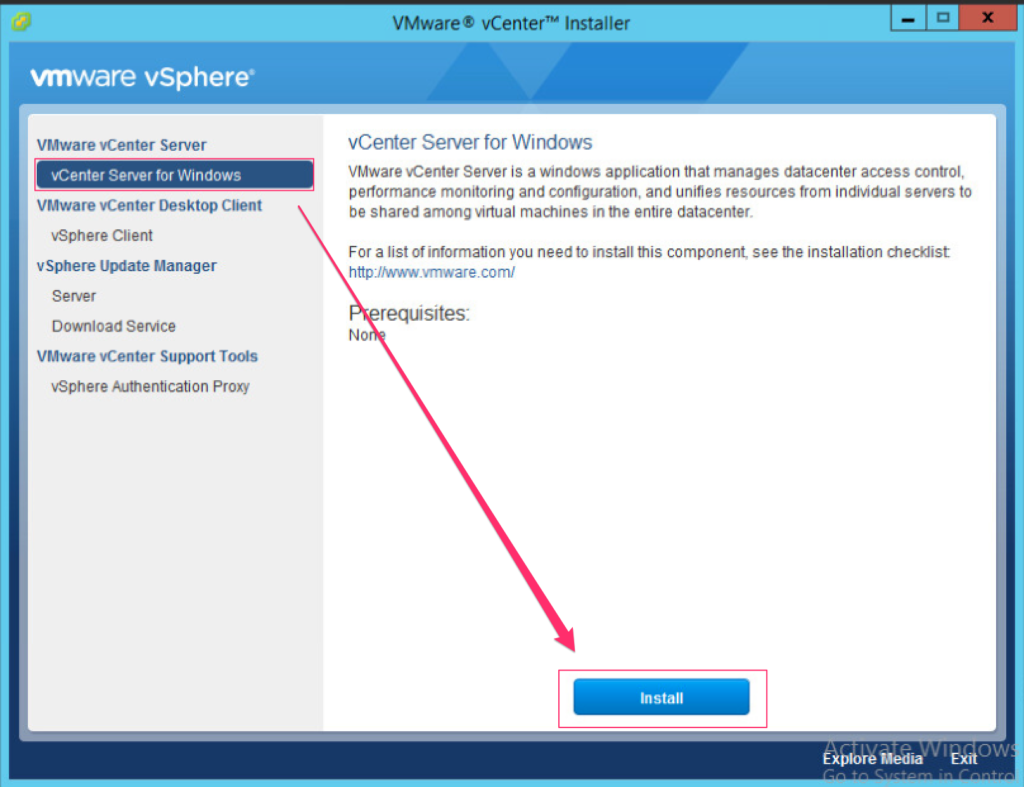
- Launch the vCenter Server Installer
- Select vCenter Server for Windows, and click Install.
- Click Next on the welcome screen.
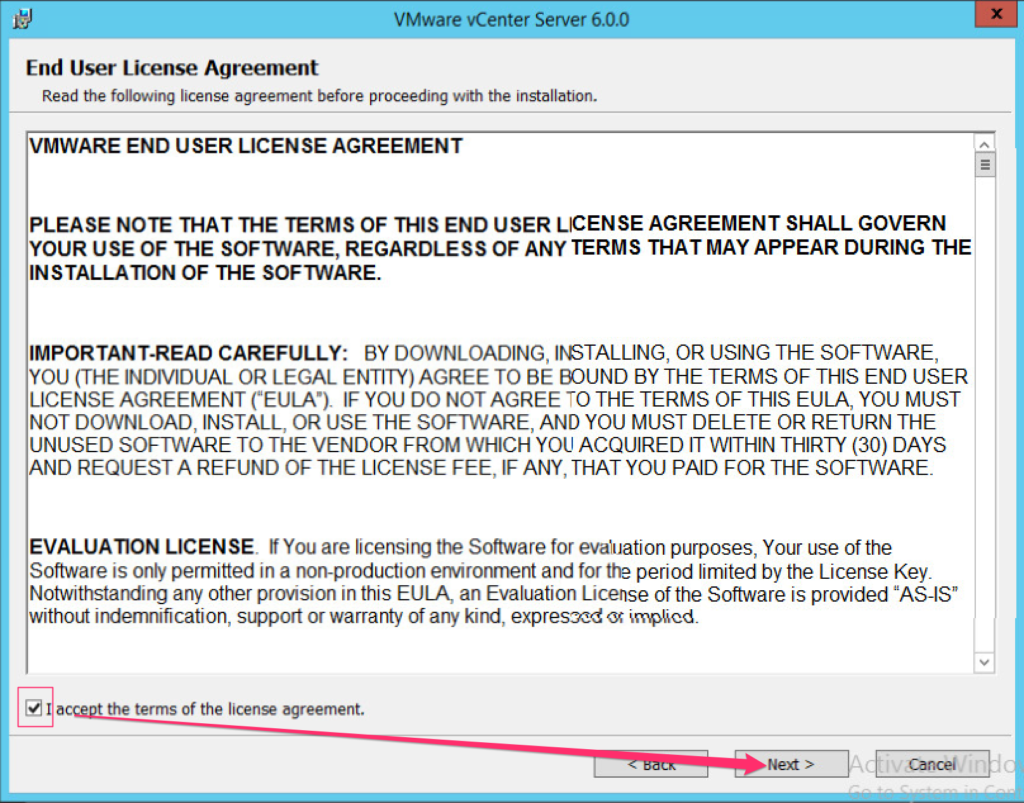
- Accept the EULA, click Next.
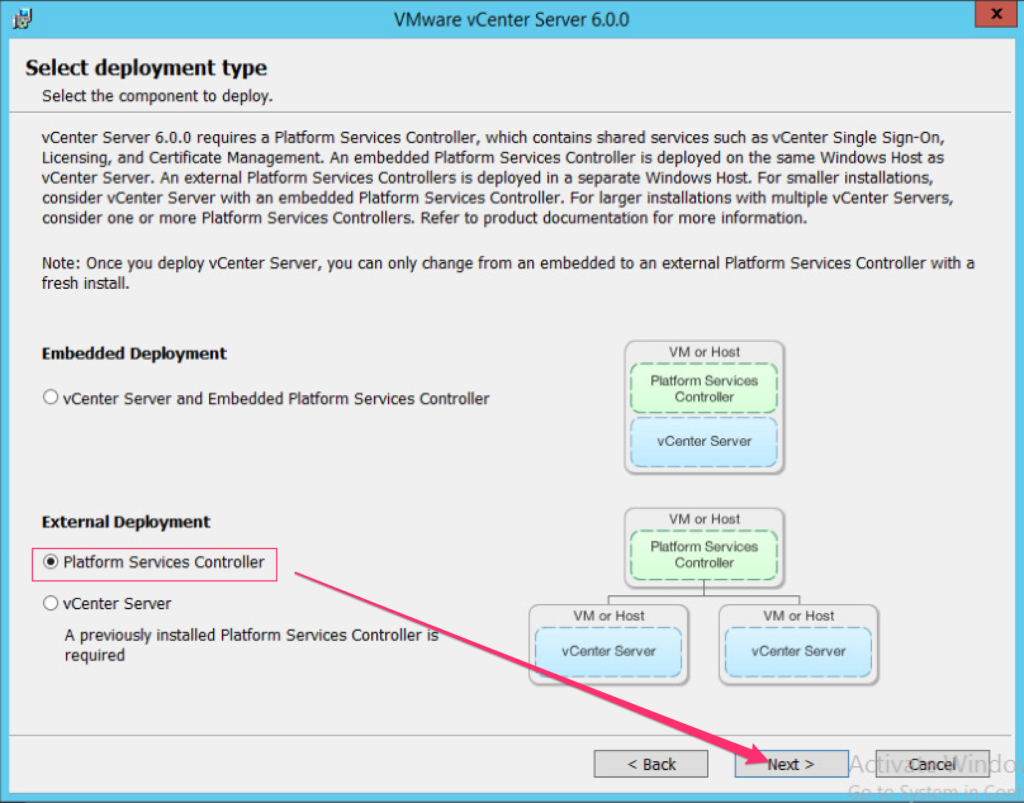
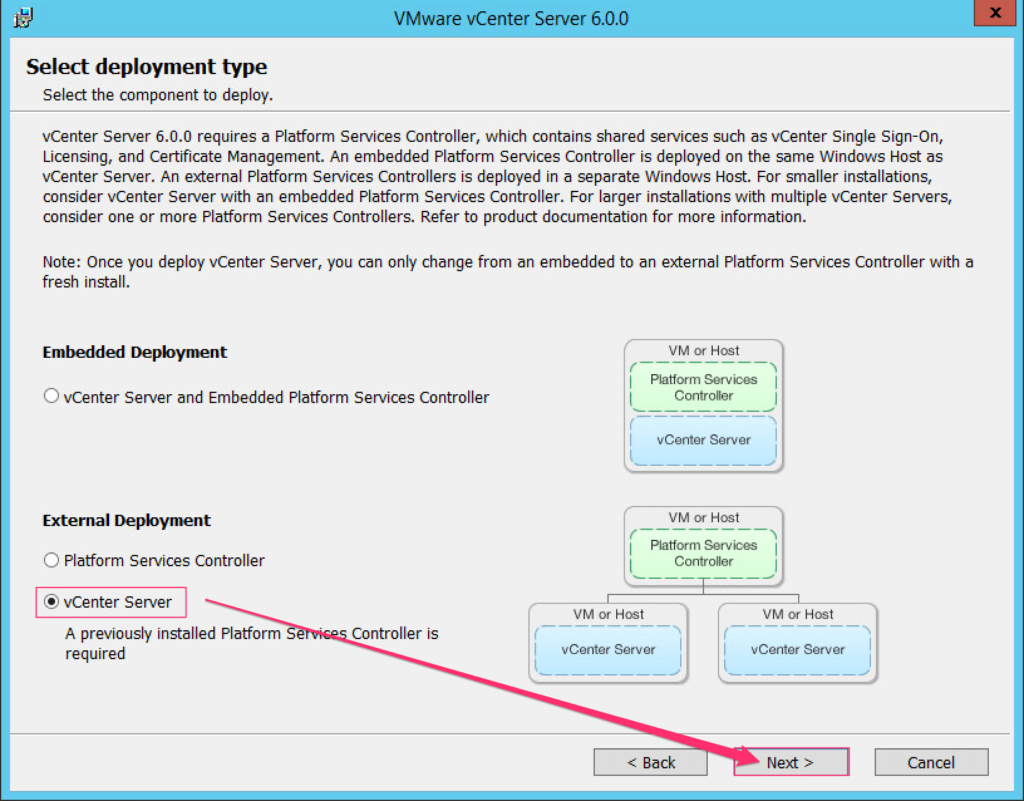
- Under External Deployment, select Platform Services Controller, and click Next.

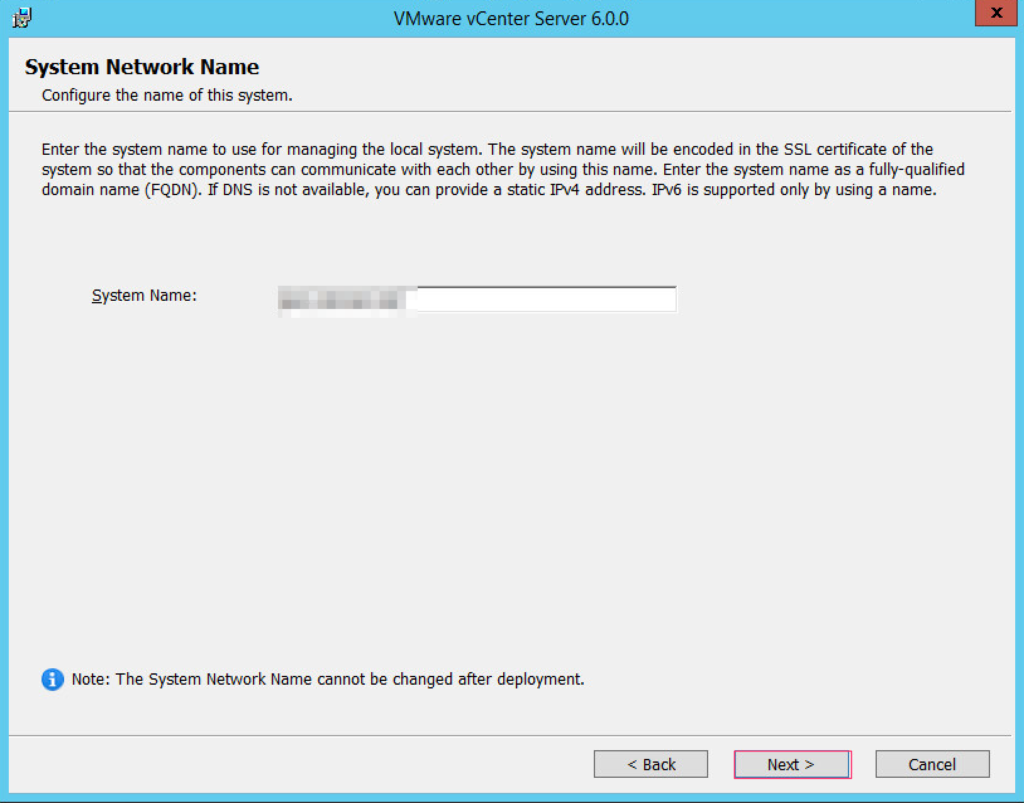
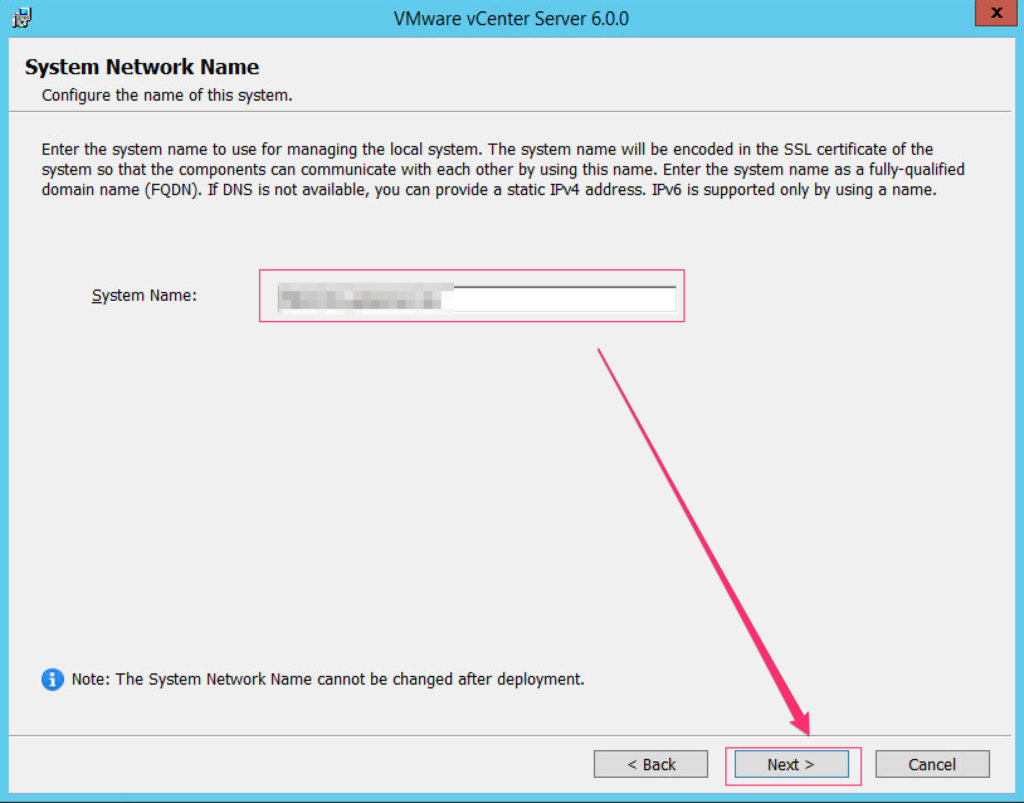
- Verify the system name (This should be the same FQDN of the PSC you are building to replace the failed one), and click Next.
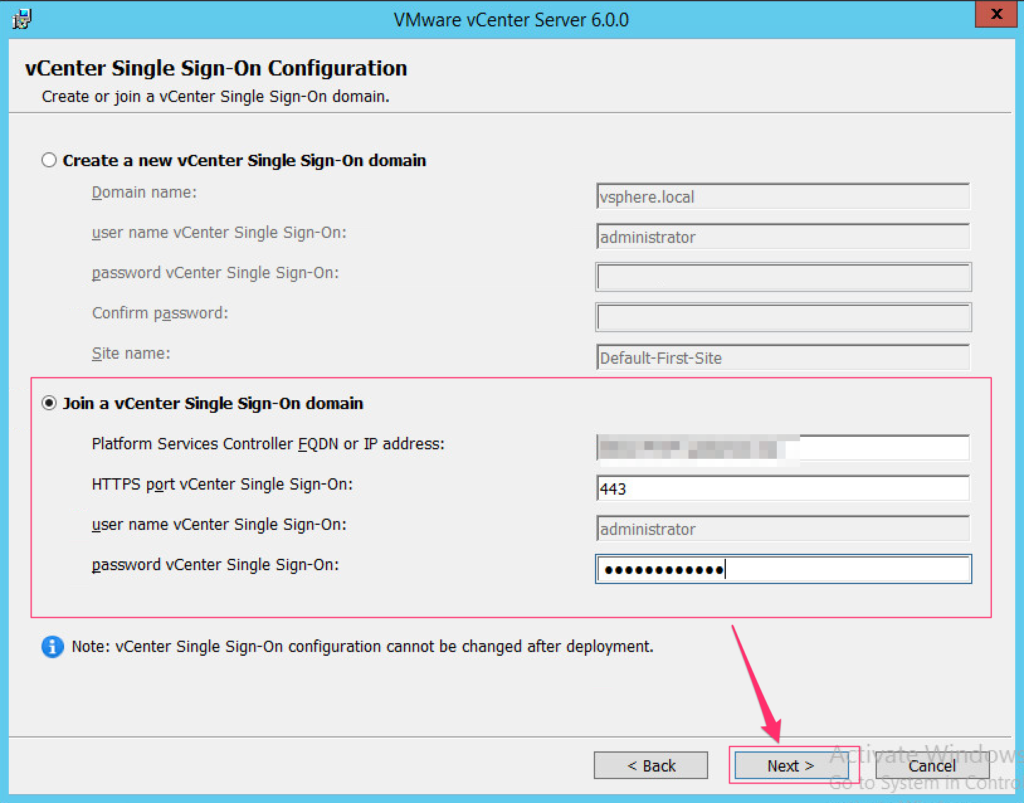
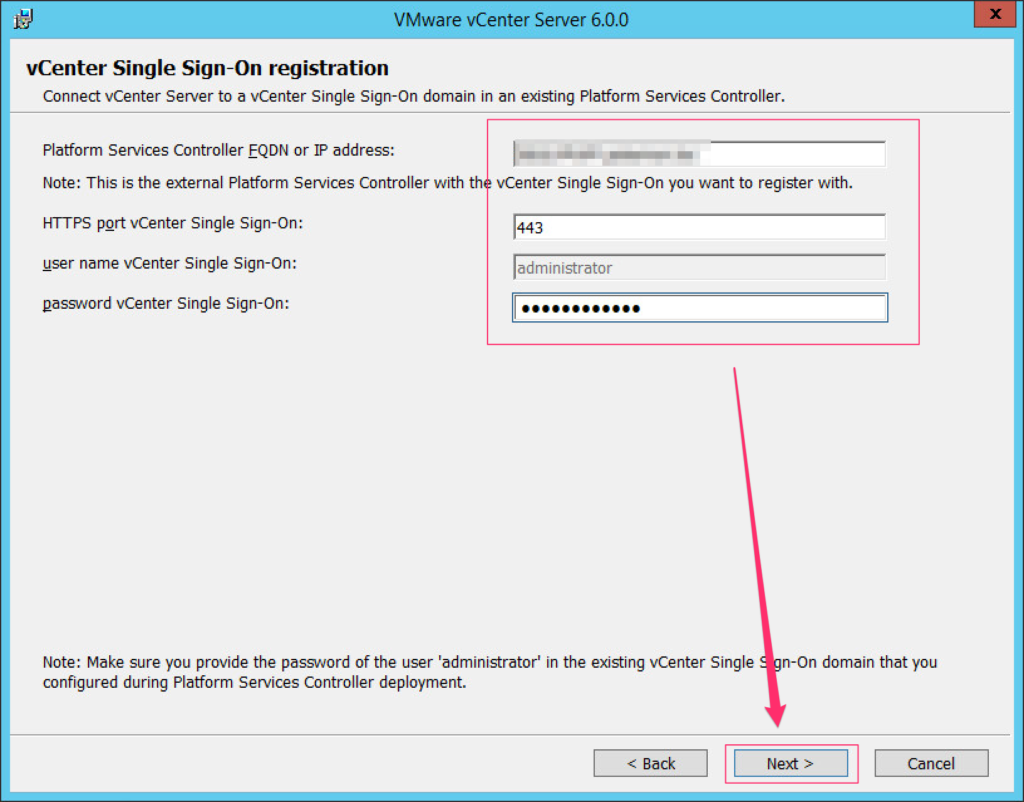
- Select Join a vCenter Single Sign-On domain.
- Enter the FQDN for the first Platform Services Controller that owns the SSO domain you want to join.
- Enter the vCenter Single Sign-On password, then click Next.

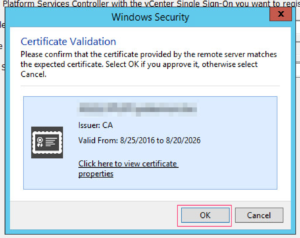
- When prompted for Certificate Validation, click OK to accept the self-signed certificate.
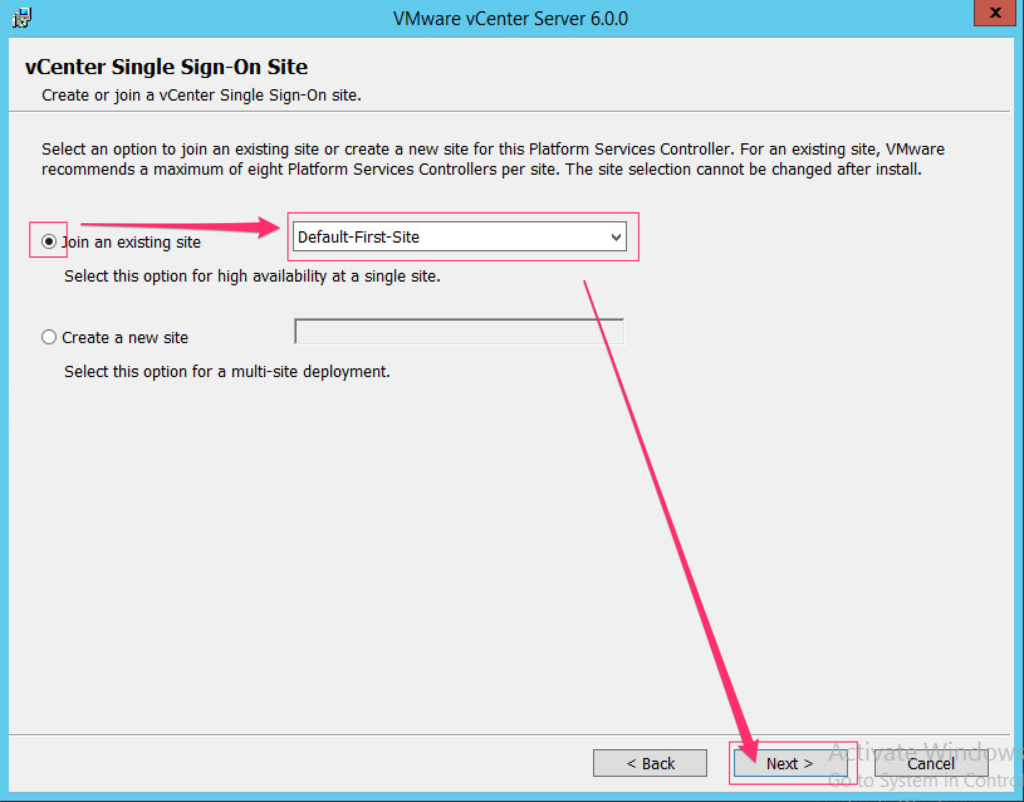
- Select Join an existing site, choose the site from the dropdown menu(should match the site name of the first PSC you created), and click Next.

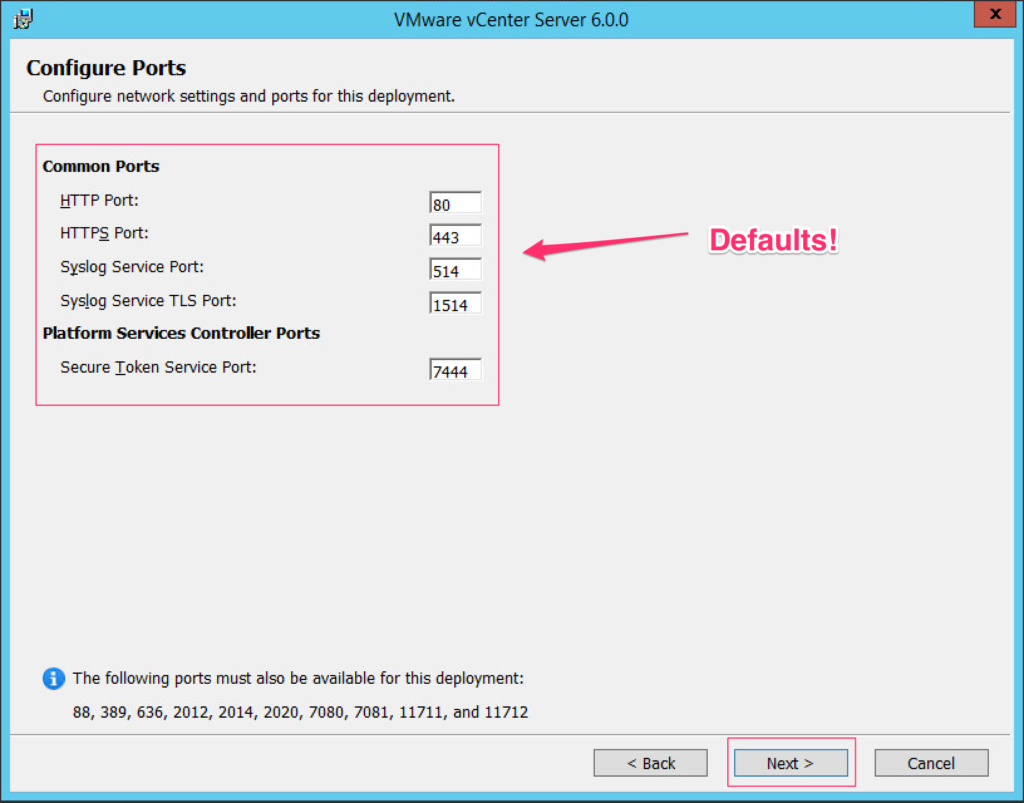
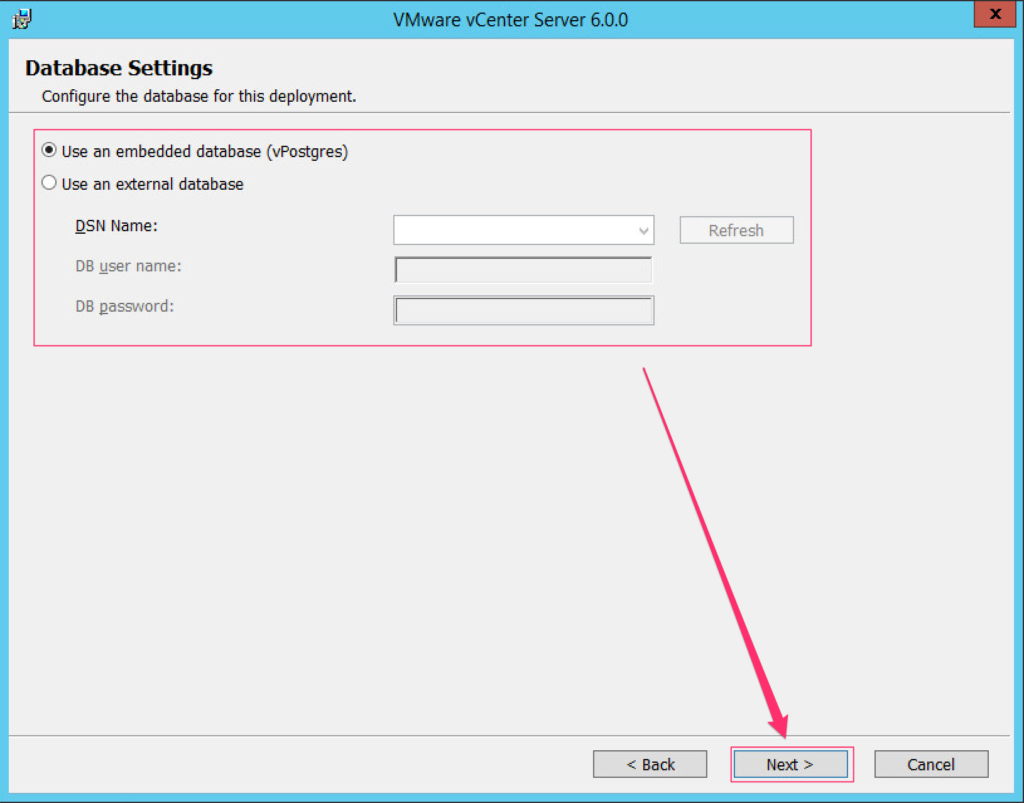
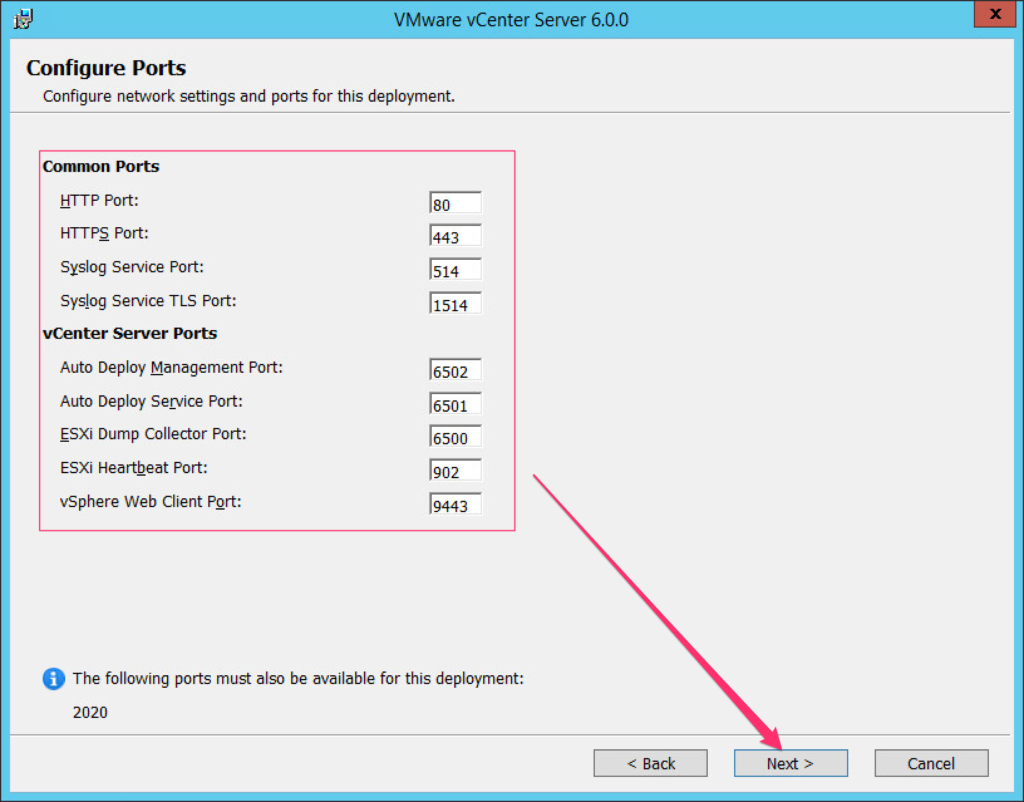
- On the Configure Ports page, make any changes necessary for your environment, and click Next.
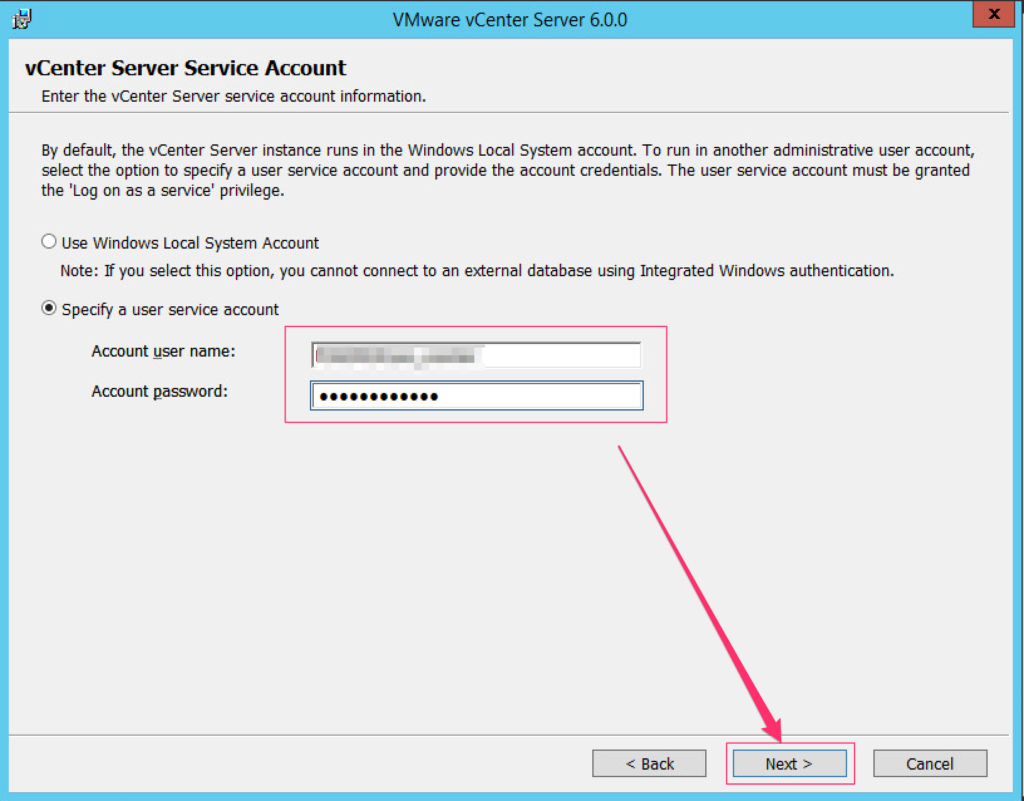
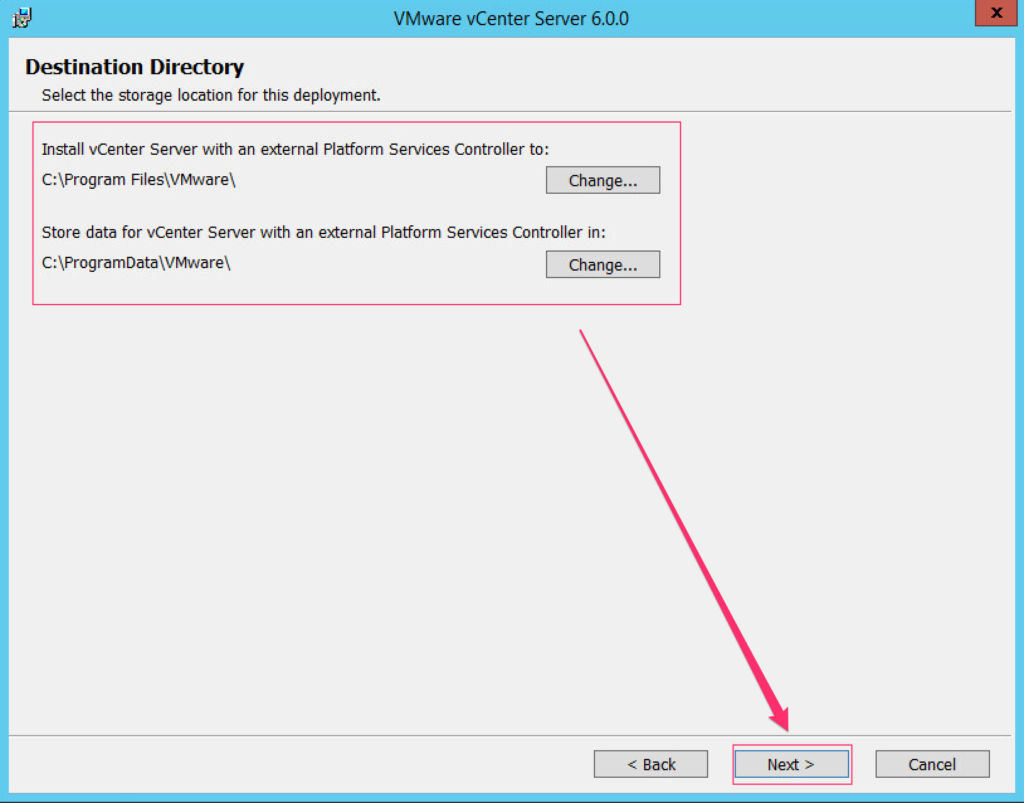
- Set the PSC installation and data directories, and click Next.
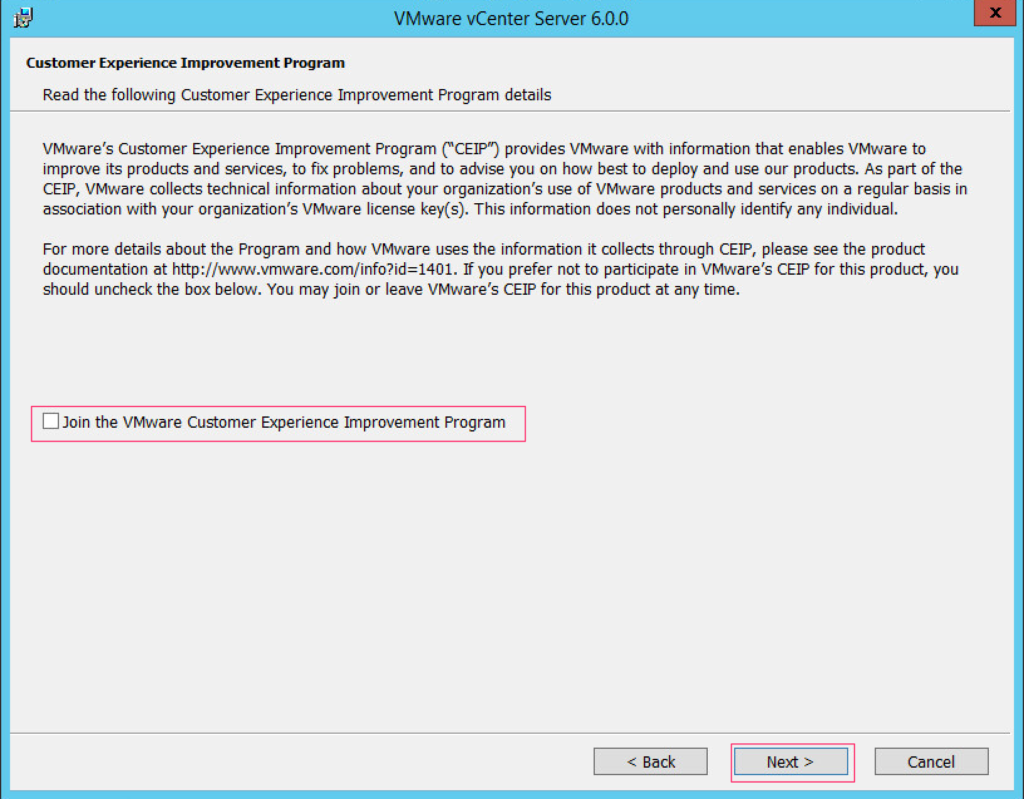
- Select whether or not to join the Customer Experience Improvement Program (CEIP), and click Next.
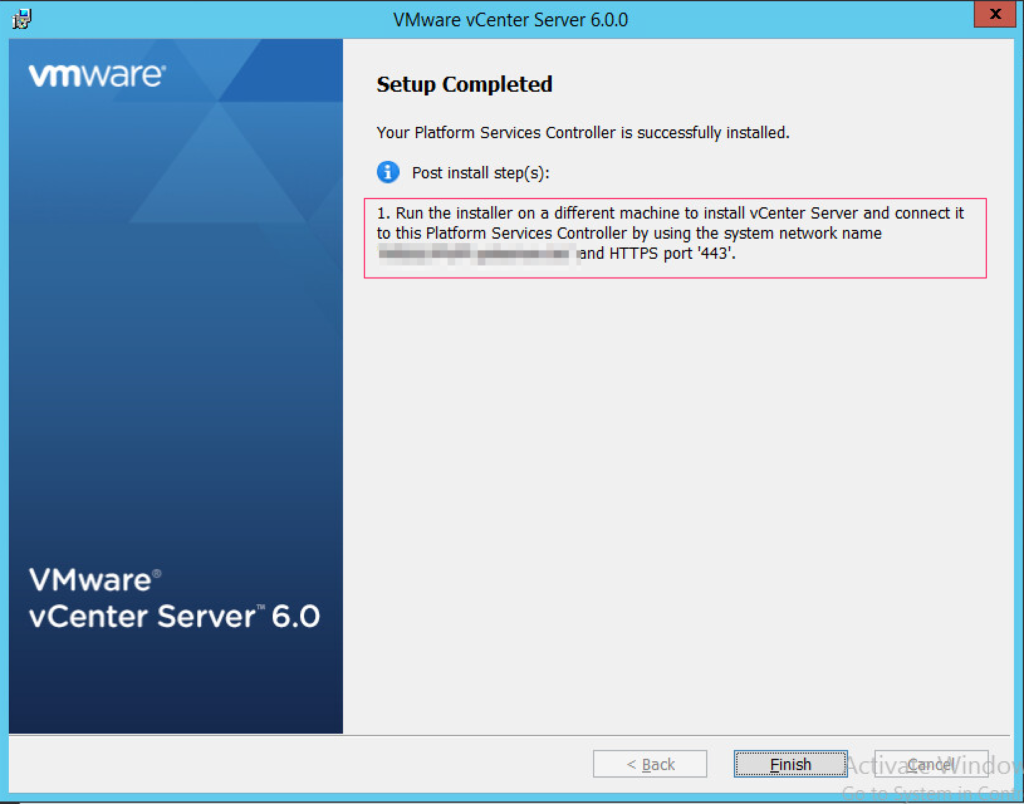
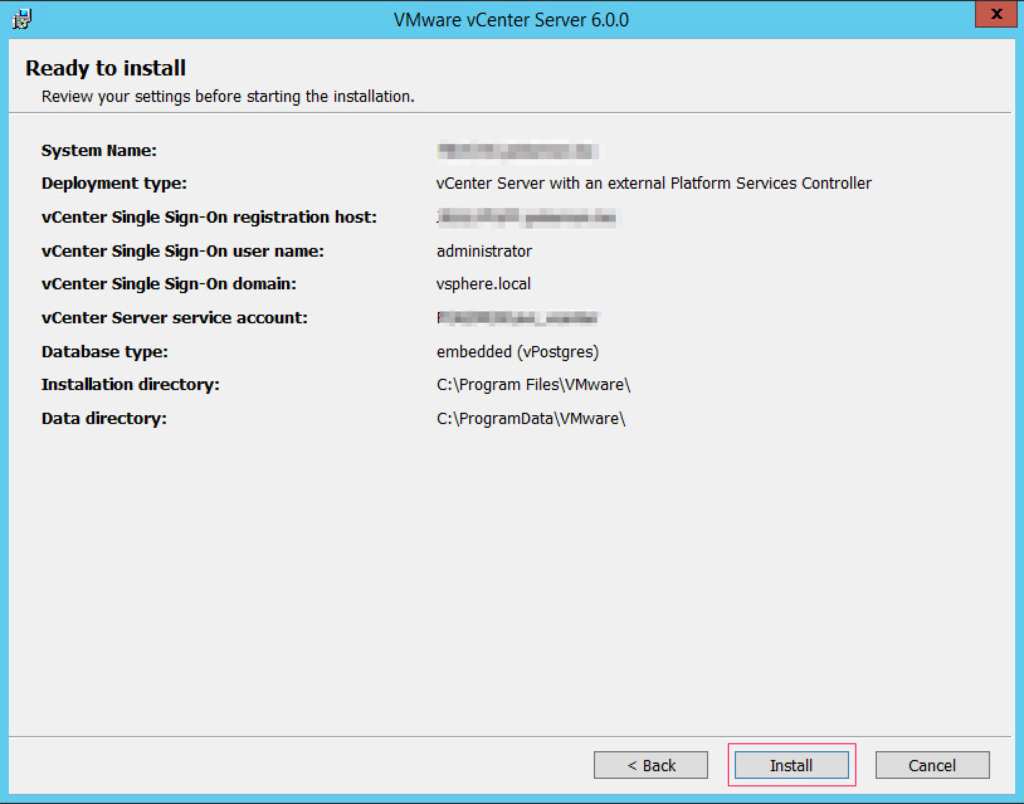
- Verify the installation summary settings, and if all looks well, click Install.
- Once the installation has completed, log into the vSphere Web Client, and navigate to Home > Administration > Deployment > System Configuration. Under the Nodes object, verify that there are now 4 nodes (you should see 2 PSCs, and 2 vCenter servers).
Next Steps:
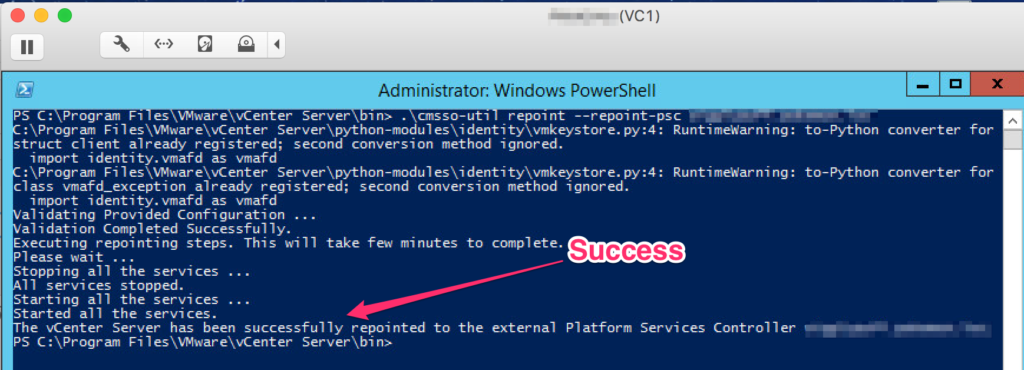
After verifying functionality of the newly added PSC, the next step is to re-point VC1 (repointed previously to PSC2) to the new PSC (PSC3).
Repoint the Connections Between vCenter Server and Platform Services Controller:
- Log onto the vCenter Server instance (VC1).
- In the command prompt (run as administrator), navigate to C:\Program Files\VMware\vCenter Server\bin (or wherever you have vCenter installed to).
- Run the cmsso-util script:
cmsso-util repoint --repoint-psc psc_fqdn_or_static_ip [--dc-port port_number]
psc_fqdn_or_static_ip – is the FQDN or static IP address of the PSC you want to repoint to.
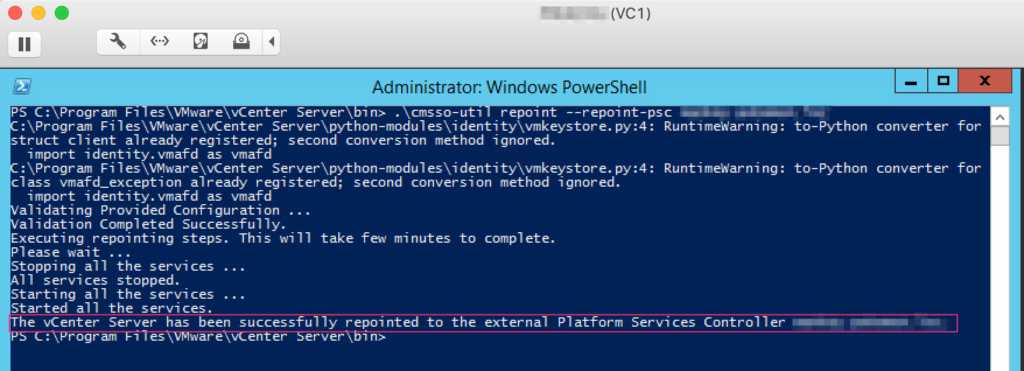
- Log into the vCenter Server instance by using the vSphere Web Client to verify that the vCenter server is running and can be managed.
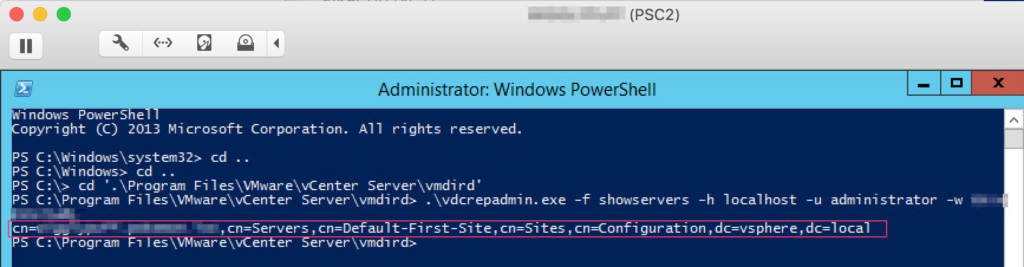
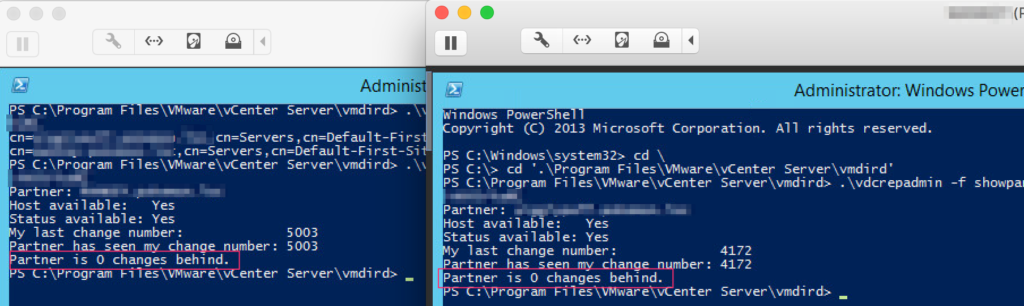
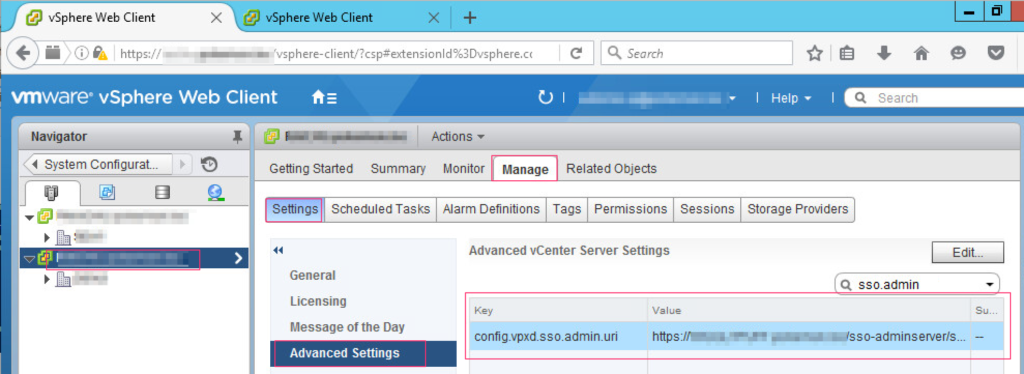
- Finally, to see what PSC each vCenter is connected to:
- Log into the vSphere Web Client, and navigate to Hosts and Clusters View.
- Select a vCenter, and go to the Manage Tab.
- In Settings, go to Advanced Settings.
- Search for the config.vpxd.sso.admin.uri
- When the result is returned, look at the Value field, and this will tell you what PSC the particular vCenter is connected to.
This completes the series for Replacing a Failed External PSC in Enhanced Linked Mode. If you find that this has helped you, please feel free to share the information. It took me quite a while to gather all the information needed, and build the environment for this, so I really hope it helps.
In my research when first encountering the issues with my failed PSC, I found that there are a lot of other bloggers out there who have written something about the issues, troubleshooting steps, and fixes related to a failed PSC. While this is not a “one fix to rule them all” solution, it is a very clean way to replace a failed PSC. I apologize for not documenting the same thing for the VCSA, however, if you follow the steps in the order I provided, the links I have in my posts also have the proper steps to execute for the VCSA.